May 10, 2008

Orange Rice Pudding

I am not a huge dessert person so when the occasion arises to make one, I want it to be quick and easy. I still have lots of Arborio rice sitting in my cabinet, so I decided to look for recipes for rice pudding. I have always loved rice pudding but never actually made it so figured this would be fun to try.

This recipe particularly stood out not only because the orange aspect sounded so interesting and yummy, but there are hardly any ingredients! How easy! Not to mention, a lot of the other recipes I looked at included more fattening stuff so I felt as though this was somewhat on the light side for dessert.

As I had guessed, this was super easy to make and the final product was very, very good. In fact, as I let the rice pudding cool in the refrigerator I seriously ate like half of it—my fridge must have lost all its cool air from me opening the door so much to have just one more little taste! I also think this is a great dessert for entertaining because you can make it ahead of time, and since it is so quick and easy, you can focus your efforts on the rest of the meal.

The only thing I want to note about the recipe is that it calls for four oranges when I think you can get away with just one. The idea is to serve the orange pieces with each serving, but do you really need a whole orange for each serving? I think just a single orange segment on top is plenty. I also suggest that you remove the membrane from the orange segments—it looks so much nicer. Or you can skip the orange slices all together and garnish with either chocolate shavings or orangettes.

Lastly, the recipe claims that it is for four servings, but I think they are pretty small servings so this may be more for three healthy size servings (either the French really do eat tiny portions, or may be I misjudged the amount before eating half of it from the fridge?).

So here is the recipe (for 4 servings) from Daniel Young’s The Bistros, Brasseries, and Wine Bars of Paris:

  • 1/2 cup short-grain rice
  • Salt
  • 4 oranges
  • 2 cups whole milk
  • 3 tablespoons sugar
  • 2 tablespoons orange marmalade
  1. Place the rice in a saucepan, cover with cold water and a pinch of salt, and bring to a boil. Remove from the heat and drain.
  2. Grate the zest of 1 orange (don't be shy zesting--this is where most of the orange flavor will come from!). Peel all the oranges, divide them into sections, and refrigerate until ready to serve.
  3. Combine the orange zest, milk, and sugar in a saucepan and heat over high heat to a boil.
  4. Add the rice, cover, lower the heat to very low, and cook, stirring occasionally so the rice does not stick, for 30 minutes.
  5. Remove the rice from the heat, add the orange marmalade, stir well, and let cool. Refrigerate until ready to serve.
  6. To serve, surround each serving of rice pudding with orange sections.

Enjoy!

Labels: ,

April 08, 2007

Ice Cream Sandwiches

Need a simple dessert that will make everyone happy? How about home-made ice cream sandwiches? Okay I say home-made when in fact I bought both the cookies and the ice cream, but that is just what made it so darn easy.

If you choose to buy the cookies as I did, I suggest getting them freshly made from a bakery. I also suggest that they be on the chewy side to make it easier to eat with the ice cream.

I would detail how to make them, but I think y’all can figure it out. Enjoy!

Labels:

December 26, 2006

Pumpkin Cheesecake with Bourbon Caramel Sauce

For Thanksgiving my friend Heather graciously invited me to spend the holiday with her and her family. Heather’s parents often host a great Thanksgiving feast for all their “orphaned” friends who do not have family in the area. This year’s feast included 26 guests!

To help with the meal, all the guests were asked to bring a dish. (Meanwhile, Heather’s parents smoked three incredibly delicious turkeys.) I was asked to bring a dessert so after much research for just the right recipe, I settled on a pumpkin cheesecake—traditional yet a bit sophisticated. I was also excited to make this recipe as I was able to use my mixer, which usually sits on top of my microwave collecting dust (I hardly bake).

For this dessert I resorted to one of my favorite cookbooks, Frank Stitt’s Southern Table: Recipes and Gracious Traditions from Highlands Bar and Grill. The recipe read really well and looked relatively strait forward. I couldn’t risk making anything that would result in anything but perfect. Sure enough, the final product was fabulous and looked really nice.

I also wanted to add a southern touch to the cheesecake. I associate bourbon with the South (Perhaps from my family trips to Jim Beam’s and Jack Daniels’s distilleries in Kentucky and Tennessee, respectively, growing up? Or the smell of southern college boys' bourbon and cokes at the football games?). So I found a recipe from Bon Appetit (November 2005) for a bourbon caramel pecan sauce to top off the cheesecake. Although the cheesecake did not need this sauce, it was certainly a great addition and was very popular. I also added some extra bourbon just to make sure it had that special kick. This sauce would be great on ice cream or really anything!

So here are the recipes for Frank Stitt’s pumpkin cheesecake and Bon Appetit’s bourbon caramel pecan sauce:

Pumpkin Cheesecake (serves 14)

Crust (see Note 1)
  • 30 Gingersnaps (or 1 ½ cups crumbs)
  • ½ cup pecans, toasted
  • ¼ cup packed light brown sugar
  • 4 tablespoons unsalted butter, melted
For the Filling (see Note 2)

  • Four 8 oz packages cream cheese, at room temperature
  • 4 large eggs (see Note 3)
  • 1 ¼ cups sugar
  • 1 ½ cups canned unsweetened pumpkin puree
  • ¼ cup heavy cream
  • 1 teaspoon cinnamon
  • ½ teaspoon all spice
  1. Preheat oven to 350 degrees.
  2. For the crust, finely grate the cookies and pecans with the brown sugar in a food processor. Add the melted butter and pulse until incorporated.
  3. Press this mixture into the bottom and 2 ¾ inches up the sides of a 10-inch spring-form pan. Set aside.
  4. For the filling, in the bowl of a stand mixer with a whisk attachment, combine the cream cheese, eggs, and sugar and beat at medium speed until light and smooth, about 8 minutes.
  5. Transfer ¾ cup of this mixture to a small bowl, cover, and refrigerate to use for the topping.
  6. Add the pumpkin puree, cream, cinnamon, and all spice to the remaining cream cheese mixture and beat until well combined. Pour the filling into the prepared crust.
  7. Bake for about 1 hour and 15 minutes, until the cheesecake puffs, the top browns, and center moves just a little when jiggled. Transfer the pan to a cooling rack and let cool for 10 minutes. Then run a knife between the sides and let cool completely on the rack.
  8. Remove the sides of the pan and set the cheesecake on a serving plate. Cover and refrigerate for at least several hours, or overnight. Before serving, spoon the reserved cream cheese mixture evenly over the top of the cheesecake (see Note 4).
Notes:
  1. I increased the ingredients for the crust by 25% (the measurements above are the original amounts). This increase allowed more mixture to work with to ensure that the crust was thick enough and covered all the surface area of the spring-form pan.
  2. When baking, make sure all your ingredients are at room temperature.
  3. To prevent bits of egg shell from going into your filling mixture, crack the eggs in a separate dish before pouring them into the mixture. This way if any shell ends up in the egg, you can easily pick it out first.
  4. Since I was making the bourbon caramel sauce to top off my cake, I removed the ¾ cup mixture but did not use it on the cake.
Caramel Bourbon Sauce
  • 1 cup (packed) dark brown sugar
  • ½ cup whipping cream
  • 6 tbsp (3/4 stick) unsalted butter
  • ¼ cup light corn syrup
  • ½ tsp salt
  • 3 to 4 tbsp bourbon (I used 6 tbsp!)
  • 1 ½ cups pecans, toasted, cooled
  1. Bring sugar, cream, butter, corn syrup, and salt to boil in deep medium saucepan, whisking until sugar dissolves.
  2. Reduce heat to medium; boil 1 minute without stirring. Remove from heat.
  3. Stir in bourbon, then pecans. Cool, stirring occasionally.
  4. Serve over individual sliced pieces of cheesecake.
Enjoy!

Labels: ,

May 13, 2006

Strawberries with Rosemary Balsamic Reduction

Do you have leftover sauce after making my Scallops with Rosemary Balsamic Reduction? Why don’t you serve it with some strawberries for a quick and yummy dessert?

This sweet yet bold reduction goes well with not only scallops, but is also a great partner with fruit.

All you do is serve some strawberries and drizzle the balsamic reduction over them. This desert will taste as great as it looks!

As a reminder, here is how you can make the reduction (for about 2 servings):
  • ½ cup Balsamic vinegar
  • 1 sprig of Fresh rosemary (about 5-6 inches)
  1. In a small saucepan add balsamic vinegar and bring to a simmer. Once it simmers, turn heat down to low so that the vinegar is just barely simmering. Once the vinegar has reduced by half, it is ready to remove from the stove. Be sure to discard the rosemary sprig.
  2. Let reduction cool, then serve with fruit.
Keep in mind that the slower the vinegar cooks down, the more time the rosemary can release its oils into the reduction. You also want to pick the smallest saucepan you have because the less surface area there is, the slower it will reduce. Furthermore, you need some depth in the vinegar in the pan so that the rosemary can float freely and not burn.

Enjoy!

Labels: , ,

March 05, 2006

Orangettes

This weekend is the 3rd Weekend Cookbook Challenge hosted by Alicat from Something So Clever and Sara from i like to cook. The theme is "sweet and savories in the various shades of orange from recipes in our unused cookbooks." Frankly, I do not have any unused cookbooks because I can only fit about five of them in my tiny apartment. Therefore, I only buy cookbooks I know I will use. Instead I found a recipe on the internet, which I rarely resort to for recipes. That somewhat works, right?

Now for my orange something. My sister-in-law's parents adore Leonidas orangettes, and as a result I too am now a huge fan. These are basically candied orange peels that are covered with luxurious Belgium chocolate. When I visit my sister-in-law's parents, we often end the evening sipping kirschwasser while nibbling on these fabulous orangettes, which is such a treat.

I remembered once watching Giada De Laurentiis's Everyday Italian on the Food Network and she made a made similar type of candy. I was so excited to see that I could make these orangettes myself (especially since Leonidas’ orangettes are not exactly cheap)! Now I had the perfect opportunity to try them out.

I found the recipe on the Food Network's website. The recipe did not look too difficult--just time consuming, which it was. I knew that if I took the time to make this, I wanted more candied orange peels than the recipe made so I doubled it (more accurately, I used three navel oranges instead of one, but I only doubled the liquid parts of the recipe).

Here is how I made the orangettes, adapted from Giada De Laurentiis's recipe:
  • 3 large navel oranges
  • 1 ½ cup of sugar
  • 1 cup water
  • 3.5 oz semisweet chocolate bar (I actually ate about a 1/3 of it first, so I only used 2/3 of the bar for the recipe which was enough)
  1. I filled a small pot half-way with water and placed it over high heat.
  2. I took three navel oranges and stripped their peels with a vegetable peeler. The strips I took off were about an inch wide and were the length from the stem end to the navel end. I found that I had to add decent pressure to the vegetable peeler to make sure I peeled the zest off with enough thickness. However, be careful not to take the white part off because it is bitter tasting.
  3. Once the water in the pot was boiling, I added the orange peels and let them boil for a minute. I then poured the peels and water into a strainer and rinsed them under cold water. The recipe calls for you to do this twice, using fresh water each time. I had read elsewhere that this process takes the bitterness out of the peels, so I went ahead and did it three times just to be sure.
  4. After I finished the boiling process, I filled the small pot with 1 cup of water and 1 ½ cups of sugar and stirred this mixture over medium high heat until the sugar was dissolved. I then brought the sugar water to a boil and added the orange peels, turning down the heat to medium low and letting the peels simmer for 15 minutes.
  5. After 15 minutes, I used tongs to transfer the peels to a dry surface with each peel separately laid out flat. When you remove the peels from the sugar water, be sure to let the sugar water drain off of them. I did not do this, and they never fully dried out. The recipe calls for you to lay the peels on a sheet of parchment paper, which I did not have. Instead I just laid them on a tin foil lined cookie sheet. Be sure to save the sugar water!!! This is the most unbelievable tasting sugar syrup you will ever have! Save it to sweeten coffee, tea, oatmeal, etc.
  6. The recipe calls for you to let the peels dry for 1 hour, but since I did not drain them too well from the sugar syrup they were quite wet. So I let mine sit in the refrigerator overnight.
  7. Once your peels are ready, melt the semisweet chocolate. The recipe suggests you melt it over a double broiler, but I opted for the microwave. I used a Swiss chocolate bar, which I broke into small pieces into a small bowl. I then put the bowl into the microwave for 30 second intervals. My chocolate took two 30 second intervals to melt.
  8. Then dip the peels into the chocolate, about 2/3 the length, and place them onto a flat surface. Again, I used a tin foil lined cookie sheet for this. Although I did let the excess chocolate drip off, I found that when I laid the peels onto their flat surface they were soon sitting in a puddle of chocolate. I did not want my orangettes to have wings! So when I finished dipping all the peels, I then transferred them to a second flat surface leaving the chocolate puddle behind. They were now ready to sit in the refrigerator for 15 minutes to set.

The final product was great! The combination of the semisweet chocolate with the tart orange peel is pure perfection. The part of the peel not covered by the chocolate was still a bit sticky since I did not drain them well enough from the sugar syrup, but otherwise, they were a success. Not to mention, are these not so beautiful? I think these are the perfect treat to end the night with. I hope you do try these.

Labels: ,

January 31, 2006

Dinner Parties at Gemma's

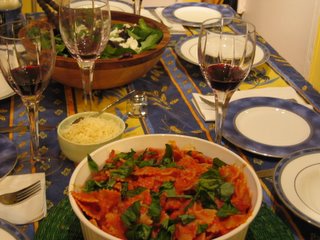
I love dinner parties—especially Gemma’s. Gemma is our English friend who moved over to the states for college and never left. Lucky for us, she brought over her English ways of hospitality, which include her fabulous dinner parties (dinner parties are very popular in England).

Gemma is a great cook as she is really not afraid to try any recipe, and if she finds a particular dish a challenge to make, it gives her all the more reason to keep trying it until she gets it perfect. Such a good friend to have…

Last Sunday evening Gemma and her husband, Sebastian (a 6’8” Californian), hosted six of us for dinner. Since it was a “work night,” the evening was a bit more chill than usual (her last event was a champagne brunch which began at 12 noon and ended at 11pm) but the food was of course just as great.

The following was the menu:

Mixed Greens Salad with Goat Cheese, Walnuts, and Balsamic Dressing

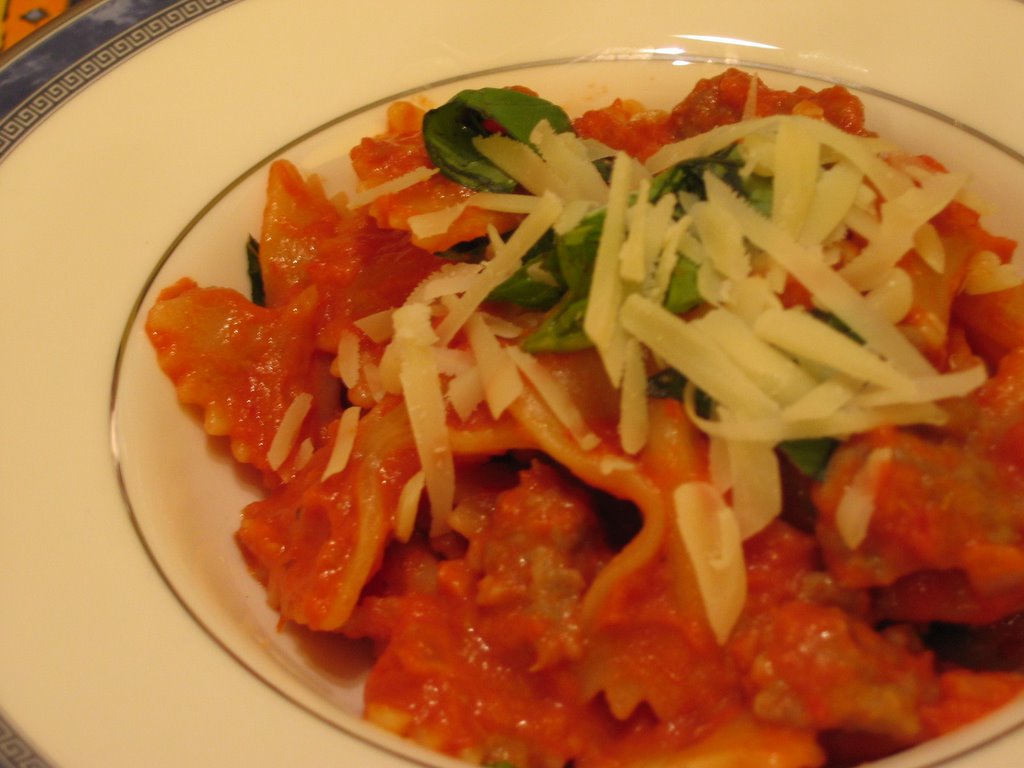
Farfalle with Sausage, Tomatoes, and Cream

Baked Ricotta and Mascarpone Tart with Chocolate and Orange

Since Gemma is a pro at giving these dinner parties, she was smart to keep the salad simple (but tasty!) and the entrée was something she found in Bon Appetit’s January 2006 issue as being fast and easy. I think this is important when giving dinner parties because the last thing you want to do is be stuck in the kitchen the whole time slaving away. The key is choosing recipes that do not taste like they were “quick and easy,” which of course these recipes succeeded at.
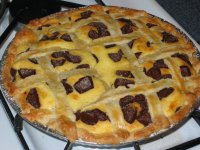
As often is the case, the dessert was the main attraction. This Gemma did slave away on all day. For starters, get this; she made her own pastry for the pie! Sebastian commented that when they woke-up Sunday morning, Gemma’s first words were, “I’ve got to get started on the pastry!” She was disappointed by the end results (aren’t all artists their own biggest critics?), but I thought it tasted great.

The pie filling was very unique by combining both chocolate and orange flavors with the ricotta and mascarpone. If you are up to the challenge, I do recommend that you try this recipe. And keep in mind that you can buy the pie crust already made at the market!


Here are the recipes from the evening:

Mixed Greens Salad with Goat Cheese, Walnuts, and Balsamic Dressing
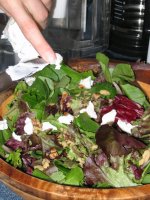
  • Bag of mixed greens
  • Goat cheese
  • Couple handfuls of toasted walnuts
  • Balsamic dressing (balsamic vinegar and olive oil mixed)

Simply mix all ingredients together. You can toast the walnuts in the oven or stovetop, but keep an eye on them as they can burn quite quickly.


Farfalle with Sausage, Tomatoes, and Cream
Makes 6 servings.
Bon Appétit, January 2006, Cara Brunetti Hillyard, Hamilton, VA

  • 2 tablespoons olive oil
  • 1 pound sweet Italian sausages, casings removed
  • 1/2 teaspoon dried crushed red pepper
  • 1 cup chopped onion
  • 3 garlic cloves, minced
  • 1 28-ounce can crushed tomatoes with added puree
  • 1/2 cup whipping cream
  • 1 pound farfalle (bow-tie pasta)
  • 1/2 cup (packed) chopped fresh basil
  • Freshly grated Pecorino Romano cheese

Heat oil in heavy large skillet over medium-high heat. Add sausage and crushed red pepper. Sauté until sausage is no longer pink, breaking up with back of fork, about 5 minutes. Add onion and garlic; sauté until onion is tender and sausage is browned, about 3 minutes longer. Add tomatoes and cream. Reduce heat to low and simmer until sausage mixture thickens, about 3 minutes. Season to taste with salt and pepper.Meanwhile, cook pasta in large pot of boiling salted water until tender but still firm to bite. Drain, reserving 1 cup cooking liquid. Return pasta to same pot. Add sausage mixture and toss over medium-low heat until sauce coats pasta, adding reserved cooking liquid by 1/4 cupfuls if mixture is dry. Transfer pasta to serving dish. Sprinkle with basil. Serve, passing cheese separately.


Baked Ricotta and Mascarpone Tart with Chocolate And Orange
Serves 8
Jamie Oliver, “Jamie’s Kitchen”
  • 1 x basic sweet pastry recipe (see below)
  • 250g/9oz ricotta cheese
  • 250g/9oz mascarpone
  • 125g/41/2oz icing sugar
  • zest of 3 oranges
  • seeds from 2 vanilla pods
  • 2 eggs, separated
  • 100g/31/2oz best-quality cooking chocolate (70% cocoa solids), roughly chopped
  • 1 egg, beaten
  • icing sugar, for dusting

Make the pastry and line a loose-bottomed 28cm/11 inch flan tin. Bake blind (i.e. with no filling) and allow to cool. Roll the extra pastry out to the same thickness in a long rectangular shape, dusting as you go, and divide into 14 strips 2.5 cm/1 inch wide. Set these aside - you will need them to finish off the tart.

Turn the oven down to 170°C/325°F/gas 3. Whip together the ricotta, mascarpone, icing sugar, orange zest, vanilla seeds and egg yolks until smooth and shiny. In a separate bowl whip up your egg whites until stiff - you can test if they're done by holding the bowl upside down over your head. Obviously the mixture should stick to the bowl and not fall on your head! Gently fold the egg whites into the mixture.

Pour into your cooled tart mould and sprinkle the chocolate over the top. Lay 7 strips of pastry across the tart, equally spaced, and then place the other 7 the other way on top of them like a lattice. Use your thumbs to trim any excess pastry off the side of the mould - this will stick it to the pastry below. Brush the pastry with a little of the beaten egg and then dust with a little icing sugar. Bake in the preheated oven for 40-45 minutes.

This tart can be served hot or cold with some ice cream, crème fraiche or cream.


Sweet Pastry

  • Make 2 x 28cm / 11 inch Tart shell
  • 250g/9oz butter200g/7oz icing sugar
  • a medium pinch of salt
  • 500g/just over 1lb flour
  • seeds from 1 vanilla pod
  • zest of 1 lemon
  • 4 egg yolks
  • 2-4 tablespoons cold milk or water

You can make this pastry by hand or in a food processor. This is enough to make 2 x 28cm / 11 inch Tart shells

Stage 1: Cream together the butter, icing sugar and salt, then rub or pulse in the flour, vanilla seeds, lemon zest and egg yolks. When this mixture has come together, looking like coarse breadcrumbs, add the cold milk or water. Pat together to form a ball of dough. Lightly flour and then squeeze it into shape. The idea is to get your ingredients to a dough form with the minimum amount of movement, i.e. keeping your pastry flaky and short (the more you work it the more elastic it will get, causing it to shrink in the oven and be chewy, and you don't want that to happen).

Stage 2: Roll the pastry into a really large, short and fat sausage shape, wrap it in Clingfilm and put it in the fridge to rest for at least 1 hour.

Stage 3: Carefully slice off very thin slivers of your pastry lengthways. You can make the slices thicker if you like, but remember that the tart will take longer to cook. Place the slivers all around your tart mould, fitting them together like a jigsaw. Push the pieces together and tidy up the sides by cleaning any excess pastry from the rim of the mould. Place in the freezer for at least 1 hour.

Stage 4: Bake them 'blind' (i.e. with no filling) for around 15 minutes at 180°C/350°F/gas 4 - this will cook them all the way through, coloring them slightly.

Once completely cooled, the shells can be filled. With baked fillings, like the Plum Tart on page 295, the tart shell has to be baked blind for around 12 minutes at 180°C/350°F/gas 4 before being filled and then baked once more.

Try this: Once your tart shell has been baked blind, brush the inside of it with a little egg white and then put it back in the oven for 30 seconds - no longer. This will give it a nice waterproof layer which will protect it from a moist filling. The pastry will stay crumbly and crisp for longer instead of going all soggy.

Labels: , , , ,

January 28, 2006

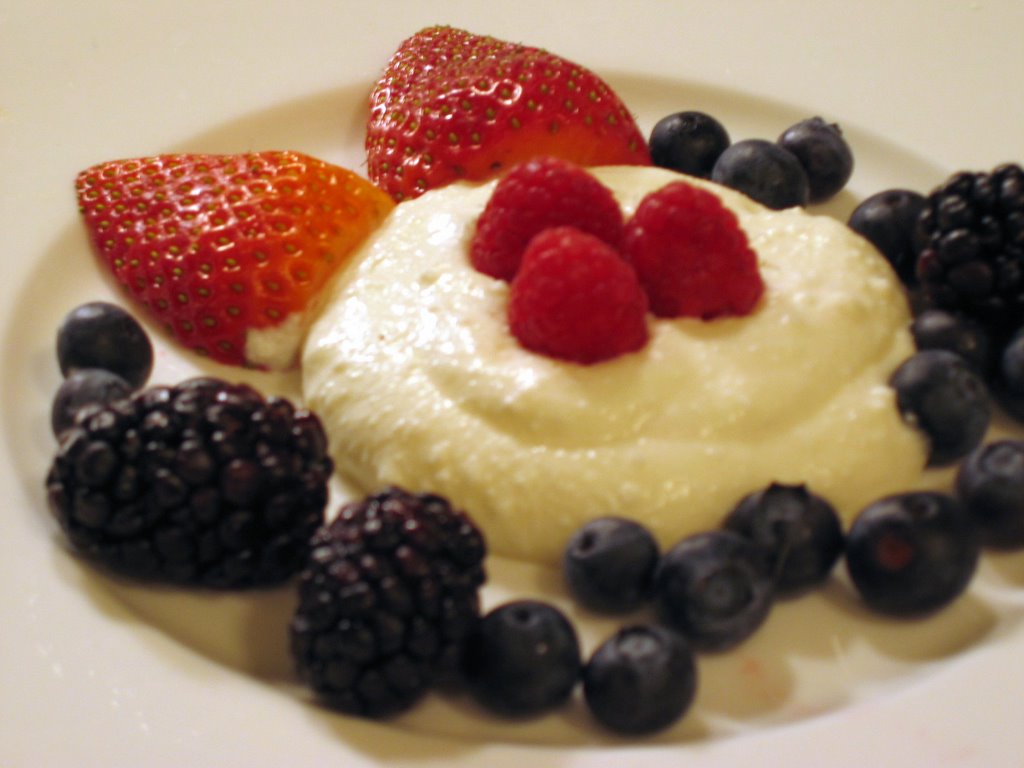
Berries with Ricotta Cheese

So you of course could not resist making my Scallops with Caramelized Pearl Onions and Tarragon Crème Fraiche Sauce, and now you are wondering what to do with that leftover Crème Fraiche. Or at least this is what I was thinking as it sits in my refrigerator hoping to be used in one last dish. So here is what I came up with.

This recipe is based on the idea of the typical strawberries with crème fraiche, but I added ricotta cheese to make it richer and thicker. Oh-la-la! And like the scallops, this is an easy dish.

The ingredients are (per serving):
  • 4 tbsp ricotta cheese (All I had in my refrigerator was part skim ricotta cheese, and this worked well. Of course the regular will probably taste better though!)
  • 2 tbsp Crème Fraiche (I love that accent on the "e"...it makes me feel sophisticated)
  • 1/4 tsp vanilla extract (Y'all, use the good stuff. You can find it at Williams-Sonoma. Yes, it is expensive but the difference in taste is huge.)
  • 1/2-1 tsp sugar
  • Handful of berries

Mix the first four ingredients together. Then place on a dish or in a bowl and sprinkle with the berries. So simple, so good, so elegant and a nice ending to a good meal with friends.

Labels: , ,