June 23, 2008

Whole Wheat Pizza with Caramelized Shallots, Goat Cheese, Cremini Mushrooms, & Watercress

My friend, Sarah, was in town from London this past week, and we met for dinner at a fun Italian restaurant located in the West Village. With Italian food fresh in my mind, I yearned for more and as a result decided to make pizza—from scratch.

I was visiting another friend, Zaidee, a few weeks ago and together we made pizza using a recipe for whole wheat dough from her Canyon Ranch Cooks cookbook. This is a cookbook geared towards those who eat healthy—something I strive towards but often stray from. Surprisingly, the dough was super simple to make (aside from some stickiness) and tasted pretty good for something that is healthy. However, all healthy aspects of the dough recipe were offset by the naughtiness of my rich toppings. Oh well.

Once you make your dough and roll it out, you can really then top it with whatever your heart desires. On this particular Sunday evening, my heart desired the sweetness of caramelized shallots matched with the creamy tang of goat cheese combined with the earthiness of cremini mushrooms freshened up with the peppery, fresh flavor of watercress. Yum!

Once my pizza was finished I sat down and indulged in my creation, which was scrumptious. On Sundays some people reach their spiritual ambitions by hearing sermons in church. I on the other hand reach my spiritual journeys through food. Oh, and wine helps too. As I devoured my pizza along with my glass of Sauvignon blanc, I did feel like I was in heaven.

So here is how you too can make this pizza. Feel free to just take the dough recipe and experiment with your own combination of toppings. Or try mine. I think either way you will be delighted. Of course, I’m sure that a proper pizza dough recipe is better, but for a healthy crust, I think this is good.

Dough Recipe, adapted from Canyon Ranch Cooks
(Canyon Ranch thinks this is for 6 servings, but I think that’s crazy talk—it is a health cookbook after all. Realistically it is for 4-5 entrée servings.)
  • 1 cup water
  • ½ tsp active dry yeast
  • ½ tsp sugar
  • ½ tsp salt
  • ¾ tsp olive oil
  • 1 cup whole wheat flour
  • 1 cup all-purpose flour
  1. In a large mixing bowl, mix the water, yeast, sugar, salt, and olive oil. Using a dough hook on medium low speed, slowly add the whole wheat and all-purpose flour and continue mixing until the dough separates from the side of the bowl. (If you do not have a mixer, or are like me and are too lazy to lug that huge thing out, you can do this by hand. Just stir the flour in with a spoon and mix well—this will take some elbow grease.)
  2. Lightly coat a medium sized bowl with olive oil. Form the dough into a ball and place it into this bowl. Cover and let stand in a warm place for 1 hour to rise.
  3. Set the oven to 400 degrees. Lightly coat baking sheet with olive oil (I used parchment paper for easier clean-up).
  4. On a floured board, punch down the dough and lightly knead for 30 seconds. Divide the dough into equal servings. Roll out the balls of dough into thin layers and place onto baking sheets.
  5. Add your toppings (see my suggestion below) and bake for 10 minutes until the crust is golden brown.
Kristin’s Toppings
(just use these measurements as guides and go with what looks right for the size of your pizza)
  • Olive oil
  • 4 large shallots, sliced
  • 24 large cremini mushrooms, sliced
  • 4 garlic cloves, roughly chopped
  • 10 oz goat cheese
  • Kosher salt
  • Pepper
  • 1 ¼ cups watercress sprigs
  • Truffle oil (optional)
  1. As the dough is rising, slowly sauté the shallots with some olive oil over medium low to medium heat. (By sautéing the shallots slowly, this allows for the sugars in them to caramelize.) Meanwhile, in another pan sauté mushrooms with some olive oil. If they get soggy, turn up heat a little and continue sautéing uncovered. When the shallots and mushrooms are done, spread out on a plate to cool.
  2. Spread a thin layer of olive oil over the top of the rolled out dough (including the edges). Evenly scatter the chopped garlic. Add the goat cheese in dollops and flatten out with the back of the spoon. Now add the mushrooms and shallots. Season well with salt and pepper.
  3. Bake pizza in oven until done per directions above. Take the pizza out of the oven and top with watercress sprigs. Drizzle additional olive oil (or truffle oil, if you have any) over the top and serve.
Enjoy!

Labels: , ,

June 08, 2008

Tomato, Mozzarella, & Basil Sandwich

I don’t know about where y’all live, but in New York it is blazing hot right now. I tried walking around earlier today and found myself melting. So I quickly headed back to my air conditioned apartment. The problem was that I didn’t have anything for lunch, and what does one want to eat on such a hot day?

In the summertime while growing up in Alabama, I remember my mom and me sitting in the kitchen enjoying yummy tomato sandwiches. We would simply toast bread, spread on some mayonnaise, add slices of tomato, and then top it with salt and pepper. They were so perfect for hot summer days—the tomatoes were cool and super juicy (in fact, often we’d have to eat our sandwiches over the sink because they were so messy from the juices) and the sandwiches were nice and light.

Mmm…I loved the idea of making a tomato sandwich but was also interested in doing something new with it. Last evening a friend and I made pizzas using fresh mozzarella as a topping, which tasted great. With the virtues of fresh mozzarella still in mind, I decided to use this. Naturally, basil is the next logical ingredient. I don’t have mayonnaise right now, but the more I was thinking about it, I preferred the idea of using olive oil and balsamic vinegar. Basically, I was creating the traditional tomato, mozzarella, and basil dish in a sandwich.

So here it is (per sandwich)…my measurements are purposely vague here as the amounts really depend on the size of your toast. So just go with it—it is pretty strait forward.
  • 2 Slices of bread
  • ½ Garlic clove
  • Olive oil
  • Balsamic vinegar
  • Tomato slices
  • Salt
  • Pepper
  • Fresh mozzarella cheese, sliced
  • Basil leaves
  1. Toast the bread slices (I prefer toasting my bread on the stove top with a grill pan, but obviously a normal toaster works as well).
  2. When the toast is ready, take the cut side of the garlic half and rub it against the top sides of each piece of toast. (This allows for the flavor of garlic without being overpowering.)
  3. Evenly sprinkle the olive oil and balsamic vinegar over the top side of one piece of toast. (For my sandwich, I probably sprinkled about 1 ½ tbsp of olive oil and 1 tbsp balsamic vinegar.)
  4. Now lay out the tomato slices over one of the pieces of toast. Sprinkle salt and pepper over the tomatoes.
  5. Add a layer of fresh mozzarella cheese over the tomatoes and then top with basil leaves.
  6. Now just take the other piece of toast and lay on top. Voila—an elegant and simply divine summer sandwich!
Enjoy!

Labels: , ,

May 19, 2008

Pasta Shells with Gouda Cheese

On a recent Sunday afternoon, I was craving comfort food (i.e., something really unhealthy). As I watched The Food Network, one of the shows featured a macaroni and cheese dish. It looked incredible and was exactly what I was in the mood for; however, I didn’t want to make some huge casserole dish. I do have my limits when eating super unhealthy dishes so I needed to come up with my own single serving version.

For my single serving version, I figured I could just make a cheese sauce to mix with pasta shells. I did some research on cheese sauces and basically learned that you just make a white sauce and then add the cheese. I can do that! So I headed to the market and perused the cheese isle. I found gouda cheese, which sounded perfect, so I grabbed it and headed back home.


This dish ended up being pretty easy to make, and the final product was sooo luxuriously rich and tasty. The shells perfectly held the sauce to ensure every bite was a rich bite. I also added chopped sage as a garnish, but as it turns out the flavor of the sage really complimented the gouda cheese and brought a freshness to the dish.

If you prefer to cut down on the richness, just using all whole milk instead of incorporating the heavy cream should be fine. Also, when choosing your gouda cheese, find one that is relatively soft (i.e., it has not been aged for terribly long). The softer it is, the easier it will melt.

Okay, here is my recipe for the special shells and cheese:

  • 1 large serving of shell pasta (or 2 small servings)
  • 1 tbsp butter
  • 1 tbsp flour
  • 1/3 cup whole milk
  • 1/4 cup heavy cream
  • 1 bay leaf
  • 1 cup grated gouda cheese
  • dash of paprika
  • healthy dose of fresh ground pepper
  • salt to taste
  • chopped sage
  1. Start boiling water in a large pot and prepare the pasta per the directions on the box.
  2. Meanwhile, over medium low heat in a sauce pan add butter and melt.
  3. Whisk in flour and let cook a minute or two.
  4. Add milk, heavy cream, and bay leaf. Whisk frequently until the milk is hot. If needed, turn the heat up a little bit.
  5. Remove bay leaf and then add the cheese. Continuously stir until all melted.
  6. Mix in paprika, pepper, and salt.
  7. Once pasta is ready, drain and mix in with cheese sauce. (If sauce is ready before the pasta, you can just keep over very low heat, stirring frequently).
  8. Serve with chopped sage on top.
Enjoy!

Labels: ,

March 25, 2007

Parmesan Risotto with Leeks and Mushrooms

Having grown up in Alabama, I never really knew what risotto was until I moved to New York. Ever since coming across this Italian staple, this dish has intrigued me—the texture, the flavor, and most of all, the technique for making it. For this last reason, I have always shied away from preparing it myself.

Well, it was time to conquer my fear and try it myself. When learning how to make something new, I resort to the internet. So yesterday I read through about 20 recipes for risotto. In the end, I learned that risotto is not hard to make, but it does require some consistent tending to.

Once I figured out the basic techniques, it was time to figure out what I wanted in my risotto. I was looking for subtle flavors that together would build a strong flavor. Okay…leeks. I love these onion-like vegetables yet I have not cooked with them in quite a while. What else... Cheese, Parmesan to be exact. I wanted the texture to be especially smooth and creamy, and this cheese would help me accomplish this task. Lastly, mushrooms. I wanted to add a meaty substance without using meat so these did the trick. I also decided to cook the risotto with some white wine to add a nice twist.

The final product was quite good, but also very rich. I used ¼ cup of half and half, which I had in my refrigerator and needed to use up. I think the recipe can do without this step if you want to make it less rich. I also used ½ pound of thinly sliced cremini mushrooms, which I think was too much. Therefore, in the recipe below I am lowering the amount and also recommending that you cut the slices into quarters to help the mushrooms blend in better. If you want to use this risotto as a side dish, you might want to eliminate the mushrooms altogether as the leeks and cheese on their own make for a really nice companion to a main dish.

Okay, here is the recipe for about 2-3 main dish servings (5 or 6 side servings):
  • 4 cups chicken broth
  • 4 tbsp olive oil
  • 1 large leek, white and pale green part sliced lengthwise, then chopped across (don’t forget to rinse the chopped pieces)
  • 1/3 lb cremini mushrooms, thinly sliced then quartered
  • 1 cup Arborio rice
  • ¾ cup dry white wine
  • ¾ cup grated fresh Parmesan cheese
  • ¼ cup half and half cream (optional)
  • Chopped parsley to garnish
  1. In a covered pot, bring chicken broth to a boil. Once boiling, lower heat to a low setting.
  2. As broth is heating up, add 2 tbsp olive oil and leeks to a large sauté pan over medium heat. Sauté leeks until they just begin to brown.
  3. At the same time, in another sauté pan over medium to medium low heat, add remaining 2 tbsp of olive oil and mushrooms. Cook until tender. Once cooked, put mushrooms aside.
  4. When the leeks are ready, add the Arborio rice and mix until the rice is glistening with the olive oil.
  5. Pour wine into the leeks and rice mixture and stir constantly until absorbed (the mixture will be thick and creamy).
  6. Add 1/2 cup of broth and mix until the rice again absorbs the liquid and reaches a thick, creamy consistency. Continue this process, pouring only 1/2 cup of broth at a time, until the rice is tender. This should take about 20 minutes. Also note, that the amount of broth needed will vary so you may not use all 4 cups. If you need more liquid, water will be just fine.
  7. Mix in cheese, cream, and mushrooms.
  8. Serve, garnished with chopped parsley.
Enjoy!

Labels: , , ,

December 26, 2006

Pumpkin Cheesecake with Bourbon Caramel Sauce

For Thanksgiving my friend Heather graciously invited me to spend the holiday with her and her family. Heather’s parents often host a great Thanksgiving feast for all their “orphaned” friends who do not have family in the area. This year’s feast included 26 guests!

To help with the meal, all the guests were asked to bring a dish. (Meanwhile, Heather’s parents smoked three incredibly delicious turkeys.) I was asked to bring a dessert so after much research for just the right recipe, I settled on a pumpkin cheesecake—traditional yet a bit sophisticated. I was also excited to make this recipe as I was able to use my mixer, which usually sits on top of my microwave collecting dust (I hardly bake).

For this dessert I resorted to one of my favorite cookbooks, Frank Stitt’s Southern Table: Recipes and Gracious Traditions from Highlands Bar and Grill. The recipe read really well and looked relatively strait forward. I couldn’t risk making anything that would result in anything but perfect. Sure enough, the final product was fabulous and looked really nice.

I also wanted to add a southern touch to the cheesecake. I associate bourbon with the South (Perhaps from my family trips to Jim Beam’s and Jack Daniels’s distilleries in Kentucky and Tennessee, respectively, growing up? Or the smell of southern college boys' bourbon and cokes at the football games?). So I found a recipe from Bon Appetit (November 2005) for a bourbon caramel pecan sauce to top off the cheesecake. Although the cheesecake did not need this sauce, it was certainly a great addition and was very popular. I also added some extra bourbon just to make sure it had that special kick. This sauce would be great on ice cream or really anything!

So here are the recipes for Frank Stitt’s pumpkin cheesecake and Bon Appetit’s bourbon caramel pecan sauce:

Pumpkin Cheesecake (serves 14)

Crust (see Note 1)
  • 30 Gingersnaps (or 1 ½ cups crumbs)
  • ½ cup pecans, toasted
  • ¼ cup packed light brown sugar
  • 4 tablespoons unsalted butter, melted
For the Filling (see Note 2)

  • Four 8 oz packages cream cheese, at room temperature
  • 4 large eggs (see Note 3)
  • 1 ¼ cups sugar
  • 1 ½ cups canned unsweetened pumpkin puree
  • ¼ cup heavy cream
  • 1 teaspoon cinnamon
  • ½ teaspoon all spice
  1. Preheat oven to 350 degrees.
  2. For the crust, finely grate the cookies and pecans with the brown sugar in a food processor. Add the melted butter and pulse until incorporated.
  3. Press this mixture into the bottom and 2 ¾ inches up the sides of a 10-inch spring-form pan. Set aside.
  4. For the filling, in the bowl of a stand mixer with a whisk attachment, combine the cream cheese, eggs, and sugar and beat at medium speed until light and smooth, about 8 minutes.
  5. Transfer ¾ cup of this mixture to a small bowl, cover, and refrigerate to use for the topping.
  6. Add the pumpkin puree, cream, cinnamon, and all spice to the remaining cream cheese mixture and beat until well combined. Pour the filling into the prepared crust.
  7. Bake for about 1 hour and 15 minutes, until the cheesecake puffs, the top browns, and center moves just a little when jiggled. Transfer the pan to a cooling rack and let cool for 10 minutes. Then run a knife between the sides and let cool completely on the rack.
  8. Remove the sides of the pan and set the cheesecake on a serving plate. Cover and refrigerate for at least several hours, or overnight. Before serving, spoon the reserved cream cheese mixture evenly over the top of the cheesecake (see Note 4).
Notes:
  1. I increased the ingredients for the crust by 25% (the measurements above are the original amounts). This increase allowed more mixture to work with to ensure that the crust was thick enough and covered all the surface area of the spring-form pan.
  2. When baking, make sure all your ingredients are at room temperature.
  3. To prevent bits of egg shell from going into your filling mixture, crack the eggs in a separate dish before pouring them into the mixture. This way if any shell ends up in the egg, you can easily pick it out first.
  4. Since I was making the bourbon caramel sauce to top off my cake, I removed the ¾ cup mixture but did not use it on the cake.
Caramel Bourbon Sauce
  • 1 cup (packed) dark brown sugar
  • ½ cup whipping cream
  • 6 tbsp (3/4 stick) unsalted butter
  • ¼ cup light corn syrup
  • ½ tsp salt
  • 3 to 4 tbsp bourbon (I used 6 tbsp!)
  • 1 ½ cups pecans, toasted, cooled
  1. Bring sugar, cream, butter, corn syrup, and salt to boil in deep medium saucepan, whisking until sugar dissolves.
  2. Reduce heat to medium; boil 1 minute without stirring. Remove from heat.
  3. Stir in bourbon, then pecans. Cool, stirring occasionally.
  4. Serve over individual sliced pieces of cheesecake.
Enjoy!

Labels: ,

November 13, 2006

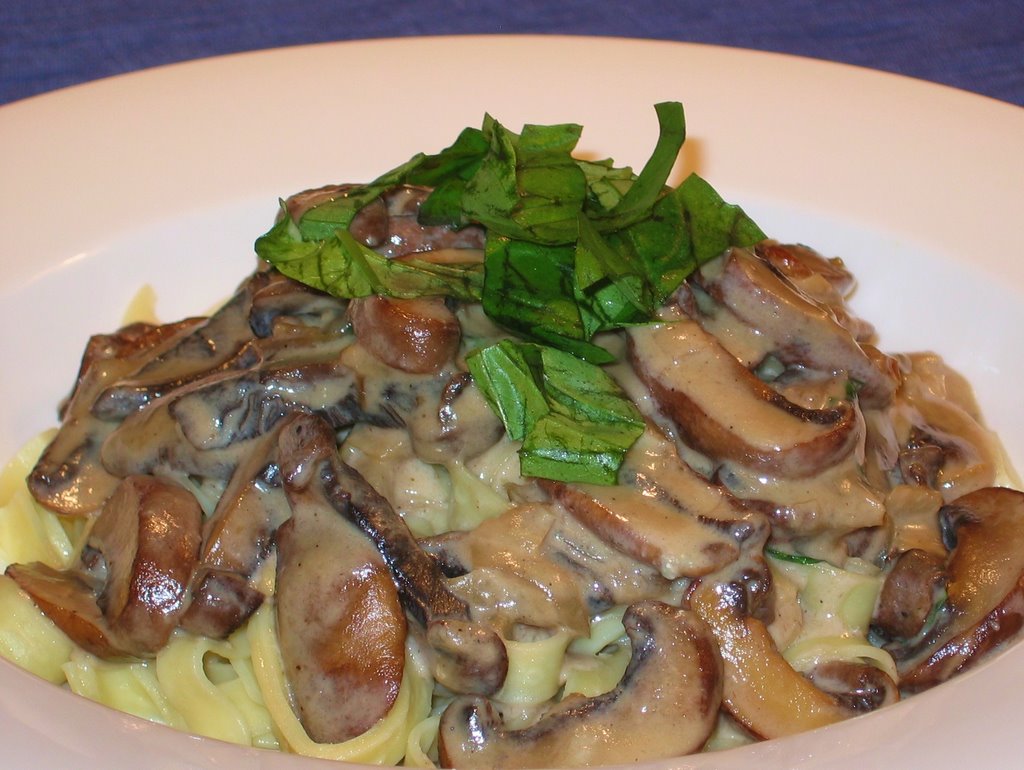
Gorgonzola Cheese and Mushroom Fettuccini

Sunday night I was looking to make something rich and filling. A couple months ago I came up with this dish and really enjoyed it. So I recreated it tonight, and it was just as I remembered it.

You may have noticed that when I cook with mushrooms, I usually choose cremini mushrooms as I did in this dish. Cremini mushrooms are baby portabellas. Therefore, like portabellas, they are meatier than the white button mushrooms and hence more earthy and tastier.

Remember that when you clean mushrooms you should never wash them under water. They tend to act like sponges and will just soak up the water, which in turn will make them tough. Instead, lightly moisten a dish towel and then just wipe off the mushrooms.

So here is the recipe (per serving):

  • 1 ½ tsp Olive oil
  • 1/2 Shallot, chopped
  • 1 Garlic clove, chopped
  • 1/4 lb Cremini mushrooms, sliced into 1/3 inch pieces
  • 1/2 tsp Flour
  • 1/2 cup Whole milk
  • 1.5 oz Gorgonzola cheese
  • 1/4 cup Sliced basil
  • Salt and pepper to taste
  • 1 serving Fettuccini pasta, cooked
  1. Over medium heat in a sauté pan, add olive oil, shallot, garlic, and mushrooms. Cover and cook, mixing periodically, until the mushrooms are cooked through.
  2. Add flour, mix, and cook for a minute (this will “cook off” the raw flour taste).
  3. Add milk and stir—picking up the dried bits on the bottom of the pan. Then add gorgonzola cheese and dissolve it into the milk. (I used a whisk for this stage).
  4. Lightly simmer mixture until it thickens to desired consistency (remember that the sauce will thicken further once it cools down on the pasta).
  5. Add basil and stir until basil has wilted. This will take a minute at most.
  6. Add salt and pepper to taste.
  7. In a serving dish with fettuccini, pour the gorgonzola and mushroom sauce on top of the pasta. Garnish with extra basil.
Enjoy!

Labels: , ,

October 05, 2006

Simple Tomato and Arugula Salad with Goat Cheese

Yesterday I entered my fourth decade in life. To appropriately honor this 30th birthday, I took the day off work (as well as the remainder of this week!) to truly treat myself. Like a true New Yorker, I began my day with a bagel and cream cheese accompanied by a frothy latte. Then I was off to the Oasis Day Spa for a Swedish massage, courtesy of my dear friend Laura. Oh the luxury!

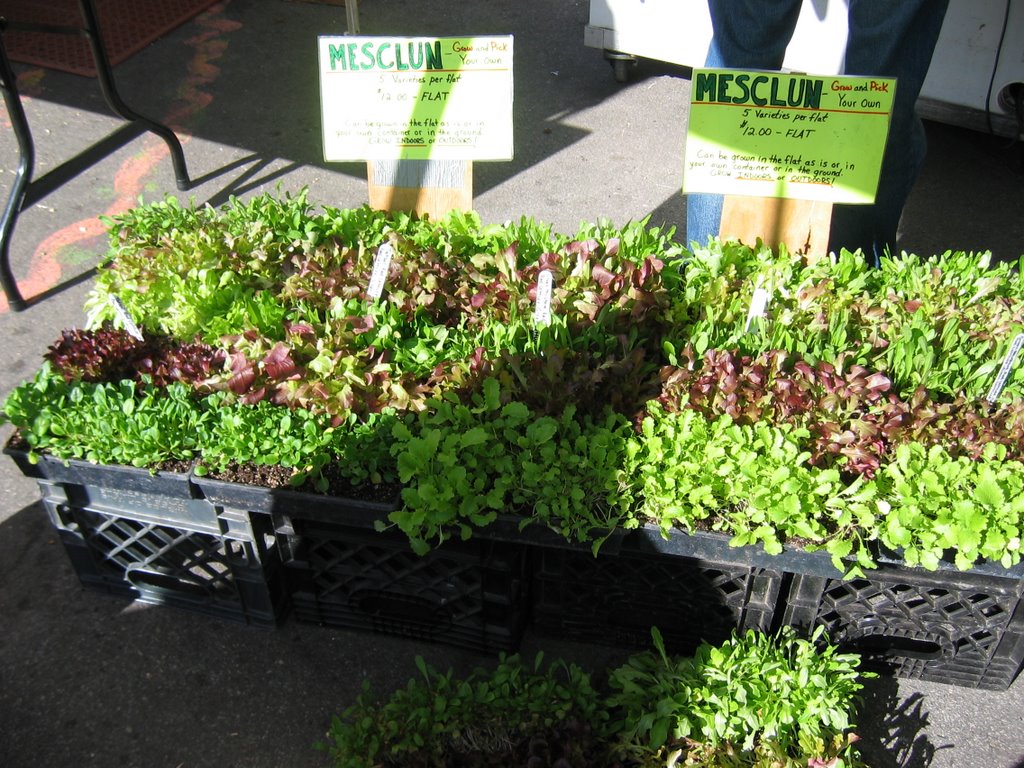
Since it was Wednesday, the farmers market was going on in Union Square. So after my spa treatment I meandered down there and roamed the market—one of my favorite things to do in New York. Many of New York’s local farmers set-up their stands here and offer an abundance of seasonal fresh produce.

Since my best friends are taking me out to celebrate my birthday this weekend, I opted to have a couple of them over for a simple dinner last night. I already knew what I wanted to serve for the main dish but was undecided about the starter. So I leisurely roamed the market scouting out the options. I wanted to serve something simple to make so that I wouldn’t have to spend too much time in the “kitchen” (I put “kitchen” in quotes because I more so have a kitchen nook), but at the same time elegant and special.

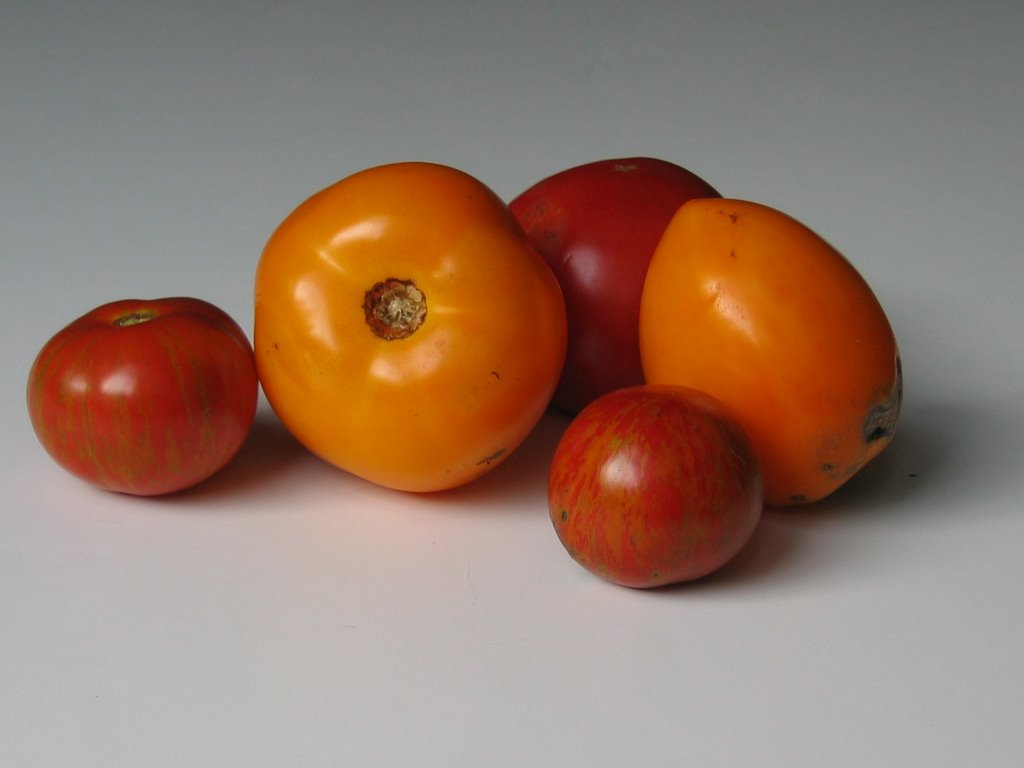
I have lately been really into tomatoes—so sweet, refreshing, and healthy. So I opted for a salad that would focus on these veggies. I chose heirloom tomatoes, which I believe are the tastiest of the tomato varieties. These awkward looking tomatoes are certainly tastier than the ordinary beef steak ones! I also opted for a variety of colors and sizes to make the salad especially pretty.

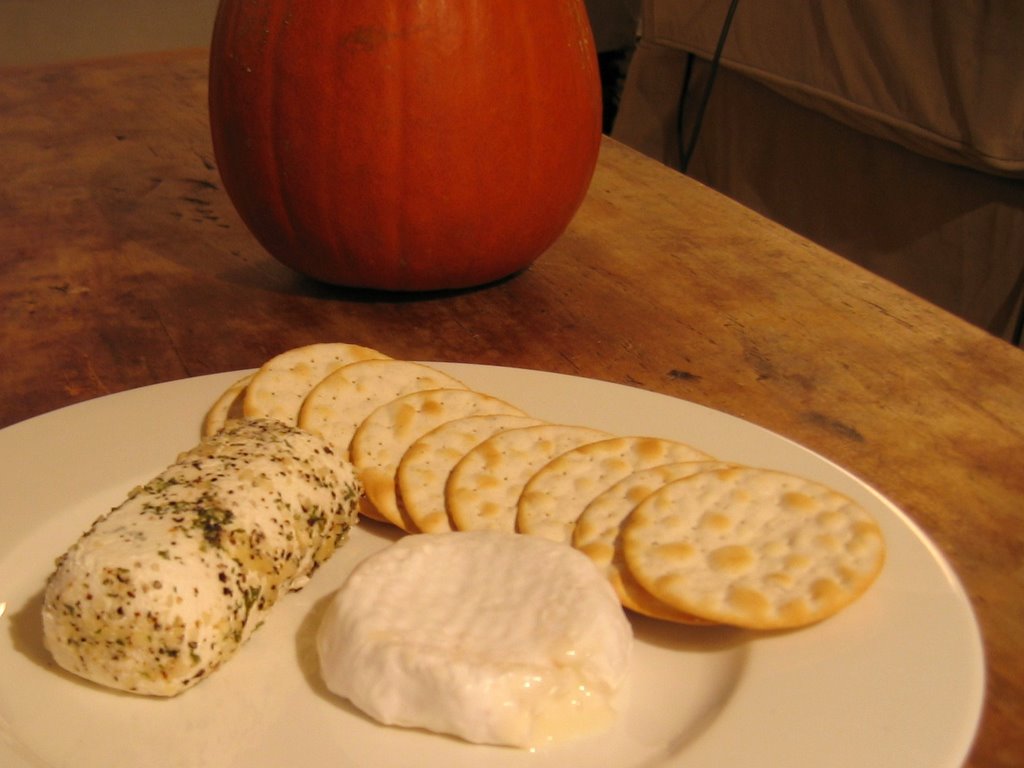
I wanted to pair the tomatoes with a leafy green so I chose arugula. This peppery leaf was the perfect contrast to the sweet taste of the tomatoes. I also wanted to add a third texture and flavor to the salad so after visiting the leaf guy, I walked over to the goat cheese lady. Here I bought a garlic and herb goat cheese log to top the salad and to also serve with crackers prior to the meal. Yum! The nice goat cheese lady also introduced me to a goat’s milk brie, which I also had to get. It was just too yummy looking to pass up, and I am a cheese slut afterall.

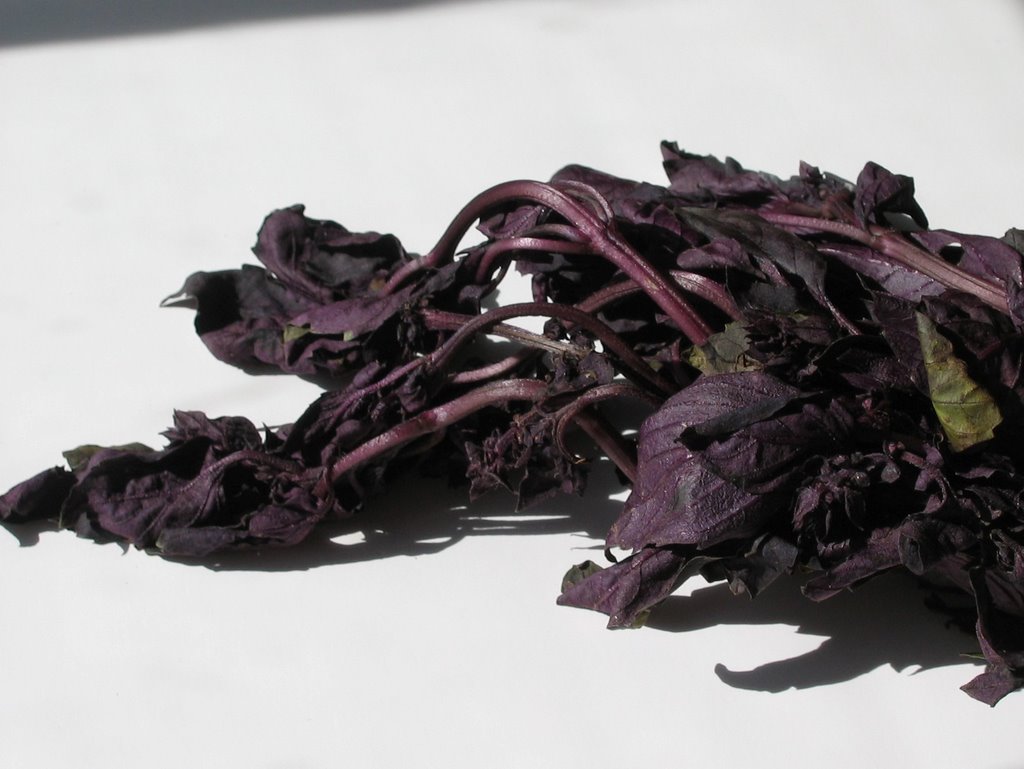
I was still yearning for something extra, so I continued to meander and found a farmer selling a wide variety of fresh herbs. Amongst his selection was an assortment of basil. In one of my food magazines I remember them explaining all the types of basil. I was particularly intrigued by purple basil, which I had never even heard of. This farmer had it so I was sold and chose this as my final ingredient to my salad. This variety of basil is a bit stronger in taste than the regular sweet basil, and the rich color was the perfect contrast to my salad.

After stopping by a lovely sidewalk cafe for some white wine and oysters, I finally made it home and prepared my special salad. The final product was simply perfect—easy to put together, aesthetically pleasing, and extremely flavorful. Here is the gist of the “recipe” (per serving):
  • Handful of arugula leaves
  • Variety of tomato slices—large/small, red/yellow
  • Dash of diced shallot
  • 5 dabs of goat cheese
  • 1 tsp of balsamic vinegar
  • 1 tsp extra virgin olive oil
  • 1 tbsp sliced basil (purple if you can find it)
  • Coarse salt and pepper
  1. Lay a bed of arugula leaves on a small plate.
  2. Spread a layer of the tomato slices on top of the arugula.
  3. Sprinkle shallot pieces over the tomatoes, followed by the goat cheese dabs.
  4. Pour the balsamic vinegar and extra virgin olive oil over the salad.
  5. Garnish with sliced basil
  6. Add salt and pepper to taste.
Enjoy!

Check-in later for my post about my entree dish (creamy polenta served with sautéed mushrooms, pancetta, and thyme topped off with a white wine reduction cream sauce)…

Labels: , , ,

February 14, 2006

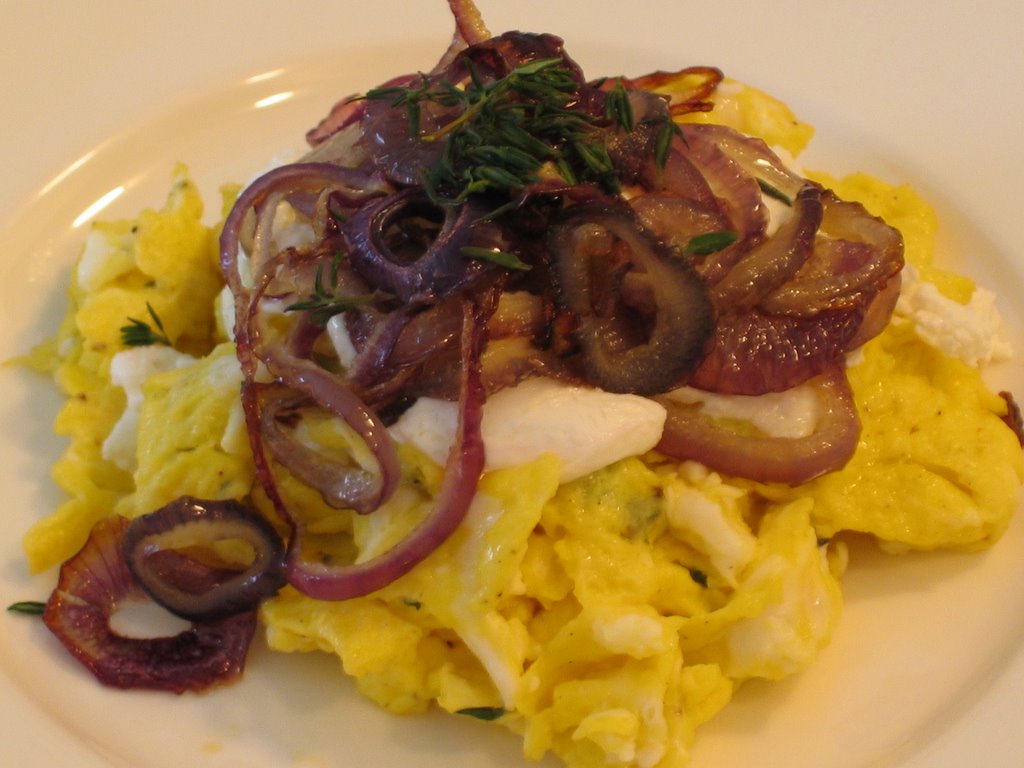
Eggs with Goat Cheese, Caramelized Onions, & Thyme

So you are having overnight guests and you want to serve a nice breakfast to them, but want to keep it simple, right? Okay, or you just want to start off your own day on a good note! Either way, this egg dish satisfies both situations.

I like making scrambled eggs and adding stuff to them better than omelets because if you are serving more than one person, being able to only make one omelet at a time is quite a pain. Plus by the time you make the last person's omelet, the first is already cold! Oh, my eggs are so much better...

So here is what you need (per serving):
  • 2 tbsp olive oil (drizzled twice around pan)
  • Red onion slices (I like to slice the onion so that the slices are rings--they look prettier on the eggs that way. Keep in mind when deciding how many onion slices you want that the onion will cook down a little.)
  • 3 eggs (or 2 will work if you aren't as hungry)
  • 1 tsp fresh thyme (dried thyme will work as well)
  • 1 pad of butter
  • Some goat cheese
  • Salt & pepper to taste
  1. In a pan over low heat add olive oil and onion slices. Cook slowly in order to allow the onions to caramelize.
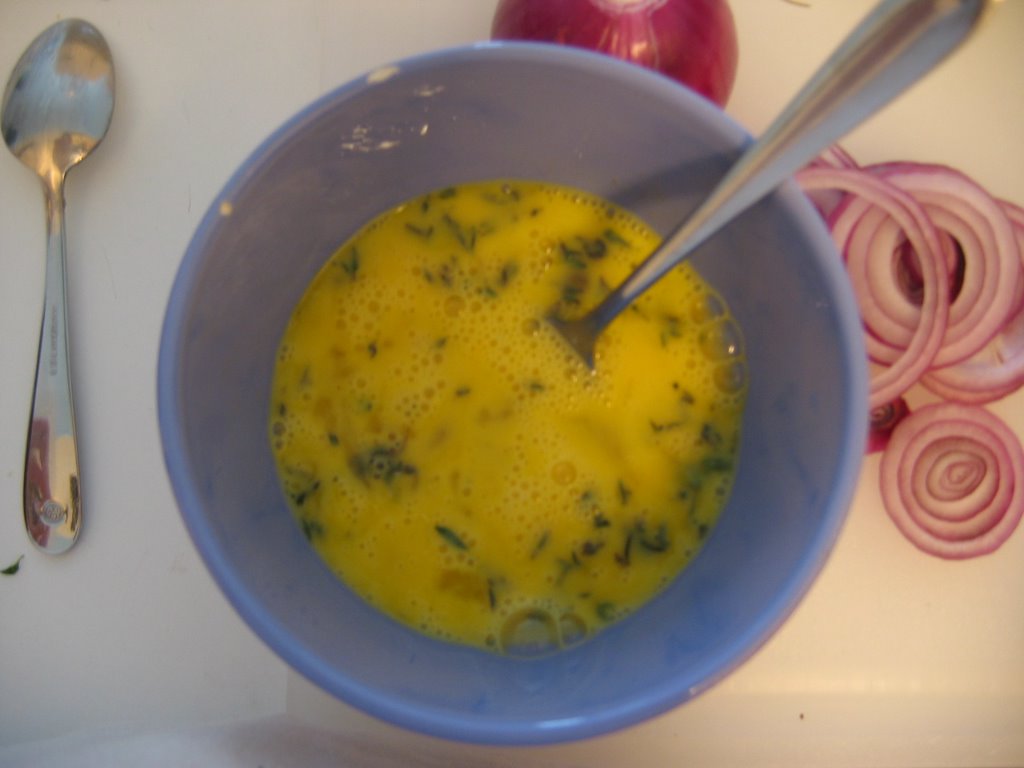
  2. While onions are cooking, mix eggs and thyme in a bowl.
  3. In another pan over medium heat, add the butter.
  4. Once the butter has melted, add the eggs and scramble them until cooked.
  5. When the eggs are ready, place them on serving dish and top with goat cheese. Don't be stingy with the cheese--it is yummy! Top the cheese with the caramelized onions and garnish with some fresh thyme on top. Salt and pepper to taste.
Enjoy!

Labels: , ,

January 31, 2006

Dinner Parties at Gemma's

I love dinner parties—especially Gemma’s. Gemma is our English friend who moved over to the states for college and never left. Lucky for us, she brought over her English ways of hospitality, which include her fabulous dinner parties (dinner parties are very popular in England).

Gemma is a great cook as she is really not afraid to try any recipe, and if she finds a particular dish a challenge to make, it gives her all the more reason to keep trying it until she gets it perfect. Such a good friend to have…

Last Sunday evening Gemma and her husband, Sebastian (a 6’8” Californian), hosted six of us for dinner. Since it was a “work night,” the evening was a bit more chill than usual (her last event was a champagne brunch which began at 12 noon and ended at 11pm) but the food was of course just as great.

The following was the menu:

Mixed Greens Salad with Goat Cheese, Walnuts, and Balsamic Dressing

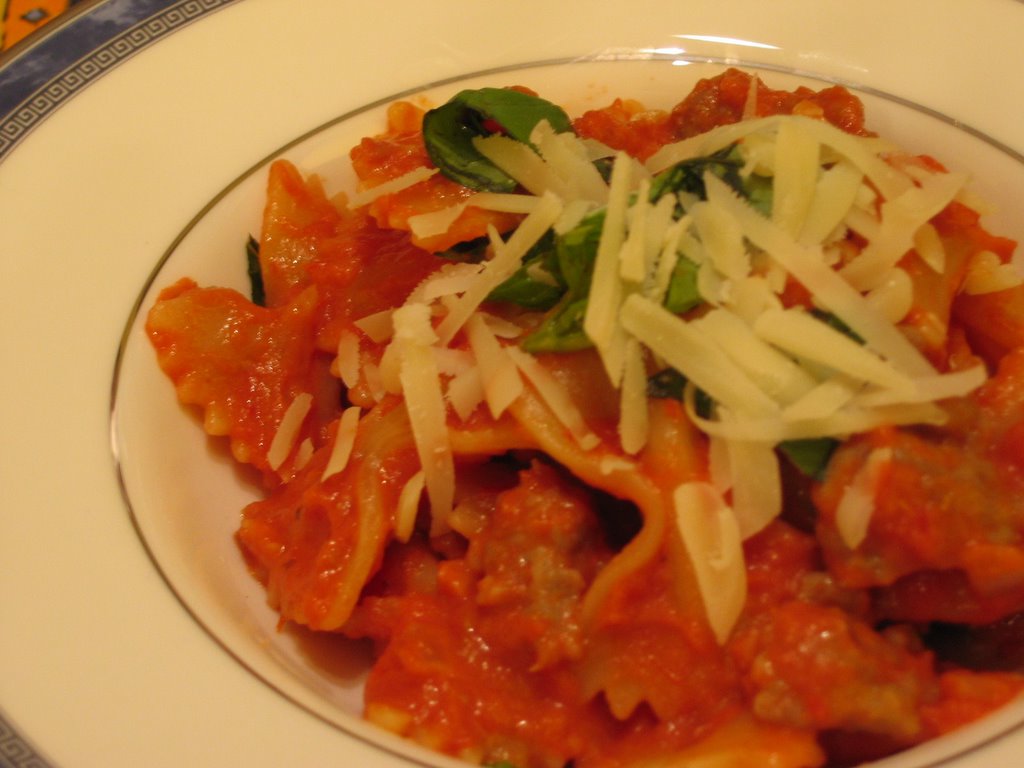
Farfalle with Sausage, Tomatoes, and Cream

Baked Ricotta and Mascarpone Tart with Chocolate and Orange

Since Gemma is a pro at giving these dinner parties, she was smart to keep the salad simple (but tasty!) and the entrée was something she found in Bon Appetit’s January 2006 issue as being fast and easy. I think this is important when giving dinner parties because the last thing you want to do is be stuck in the kitchen the whole time slaving away. The key is choosing recipes that do not taste like they were “quick and easy,” which of course these recipes succeeded at.

As often is the case, the dessert was the main attraction. This Gemma did slave away on all day. For starters, get this; she made her own pastry for the pie! Sebastian commented that when they woke-up Sunday morning, Gemma’s first words were, “I’ve got to get started on the pastry!” She was disappointed by the end results (aren’t all artists their own biggest critics?), but I thought it tasted great.

The pie filling was very unique by combining both chocolate and orange flavors with the ricotta and mascarpone. If you are up to the challenge, I do recommend that you try this recipe. And keep in mind that you can buy the pie crust already made at the market!


Here are the recipes from the evening:

Mixed Greens Salad with Goat Cheese, Walnuts, and Balsamic Dressing

  • Bag of mixed greens
  • Goat cheese
  • Couple handfuls of toasted walnuts
  • Balsamic dressing (balsamic vinegar and olive oil mixed)

Simply mix all ingredients together. You can toast the walnuts in the oven or stovetop, but keep an eye on them as they can burn quite quickly.


Farfalle with Sausage, Tomatoes, and Cream
Makes 6 servings.
Bon Appétit, January 2006, Cara Brunetti Hillyard, Hamilton, VA

  • 2 tablespoons olive oil
  • 1 pound sweet Italian sausages, casings removed
  • 1/2 teaspoon dried crushed red pepper
  • 1 cup chopped onion
  • 3 garlic cloves, minced
  • 1 28-ounce can crushed tomatoes with added puree
  • 1/2 cup whipping cream
  • 1 pound farfalle (bow-tie pasta)
  • 1/2 cup (packed) chopped fresh basil
  • Freshly grated Pecorino Romano cheese

Heat oil in heavy large skillet over medium-high heat. Add sausage and crushed red pepper. Sauté until sausage is no longer pink, breaking up with back of fork, about 5 minutes. Add onion and garlic; sauté until onion is tender and sausage is browned, about 3 minutes longer. Add tomatoes and cream. Reduce heat to low and simmer until sausage mixture thickens, about 3 minutes. Season to taste with salt and pepper.Meanwhile, cook pasta in large pot of boiling salted water until tender but still firm to bite. Drain, reserving 1 cup cooking liquid. Return pasta to same pot. Add sausage mixture and toss over medium-low heat until sauce coats pasta, adding reserved cooking liquid by 1/4 cupfuls if mixture is dry. Transfer pasta to serving dish. Sprinkle with basil. Serve, passing cheese separately.


Baked Ricotta and Mascarpone Tart with Chocolate And Orange
Serves 8
Jamie Oliver, “Jamie’s Kitchen”
  • 1 x basic sweet pastry recipe (see below)
  • 250g/9oz ricotta cheese
  • 250g/9oz mascarpone
  • 125g/41/2oz icing sugar
  • zest of 3 oranges
  • seeds from 2 vanilla pods
  • 2 eggs, separated
  • 100g/31/2oz best-quality cooking chocolate (70% cocoa solids), roughly chopped
  • 1 egg, beaten
  • icing sugar, for dusting

Make the pastry and line a loose-bottomed 28cm/11 inch flan tin. Bake blind (i.e. with no filling) and allow to cool. Roll the extra pastry out to the same thickness in a long rectangular shape, dusting as you go, and divide into 14 strips 2.5 cm/1 inch wide. Set these aside - you will need them to finish off the tart.

Turn the oven down to 170°C/325°F/gas 3. Whip together the ricotta, mascarpone, icing sugar, orange zest, vanilla seeds and egg yolks until smooth and shiny. In a separate bowl whip up your egg whites until stiff - you can test if they're done by holding the bowl upside down over your head. Obviously the mixture should stick to the bowl and not fall on your head! Gently fold the egg whites into the mixture.

Pour into your cooled tart mould and sprinkle the chocolate over the top. Lay 7 strips of pastry across the tart, equally spaced, and then place the other 7 the other way on top of them like a lattice. Use your thumbs to trim any excess pastry off the side of the mould - this will stick it to the pastry below. Brush the pastry with a little of the beaten egg and then dust with a little icing sugar. Bake in the preheated oven for 40-45 minutes.

This tart can be served hot or cold with some ice cream, crème fraiche or cream.


Sweet Pastry

  • Make 2 x 28cm / 11 inch Tart shell
  • 250g/9oz butter200g/7oz icing sugar
  • a medium pinch of salt
  • 500g/just over 1lb flour
  • seeds from 1 vanilla pod
  • zest of 1 lemon
  • 4 egg yolks
  • 2-4 tablespoons cold milk or water

You can make this pastry by hand or in a food processor. This is enough to make 2 x 28cm / 11 inch Tart shells

Stage 1: Cream together the butter, icing sugar and salt, then rub or pulse in the flour, vanilla seeds, lemon zest and egg yolks. When this mixture has come together, looking like coarse breadcrumbs, add the cold milk or water. Pat together to form a ball of dough. Lightly flour and then squeeze it into shape. The idea is to get your ingredients to a dough form with the minimum amount of movement, i.e. keeping your pastry flaky and short (the more you work it the more elastic it will get, causing it to shrink in the oven and be chewy, and you don't want that to happen).

Stage 2: Roll the pastry into a really large, short and fat sausage shape, wrap it in Clingfilm and put it in the fridge to rest for at least 1 hour.

Stage 3: Carefully slice off very thin slivers of your pastry lengthways. You can make the slices thicker if you like, but remember that the tart will take longer to cook. Place the slivers all around your tart mould, fitting them together like a jigsaw. Push the pieces together and tidy up the sides by cleaning any excess pastry from the rim of the mould. Place in the freezer for at least 1 hour.

Stage 4: Bake them 'blind' (i.e. with no filling) for around 15 minutes at 180°C/350°F/gas 4 - this will cook them all the way through, coloring them slightly.

Once completely cooled, the shells can be filled. With baked fillings, like the Plum Tart on page 295, the tart shell has to be baked blind for around 12 minutes at 180°C/350°F/gas 4 before being filled and then baked once more.

Try this: Once your tart shell has been baked blind, brush the inside of it with a little egg white and then put it back in the oven for 30 seconds - no longer. This will give it a nice waterproof layer which will protect it from a moist filling. The pastry will stay crumbly and crisp for longer instead of going all soggy.

Labels: , , , ,

January 28, 2006

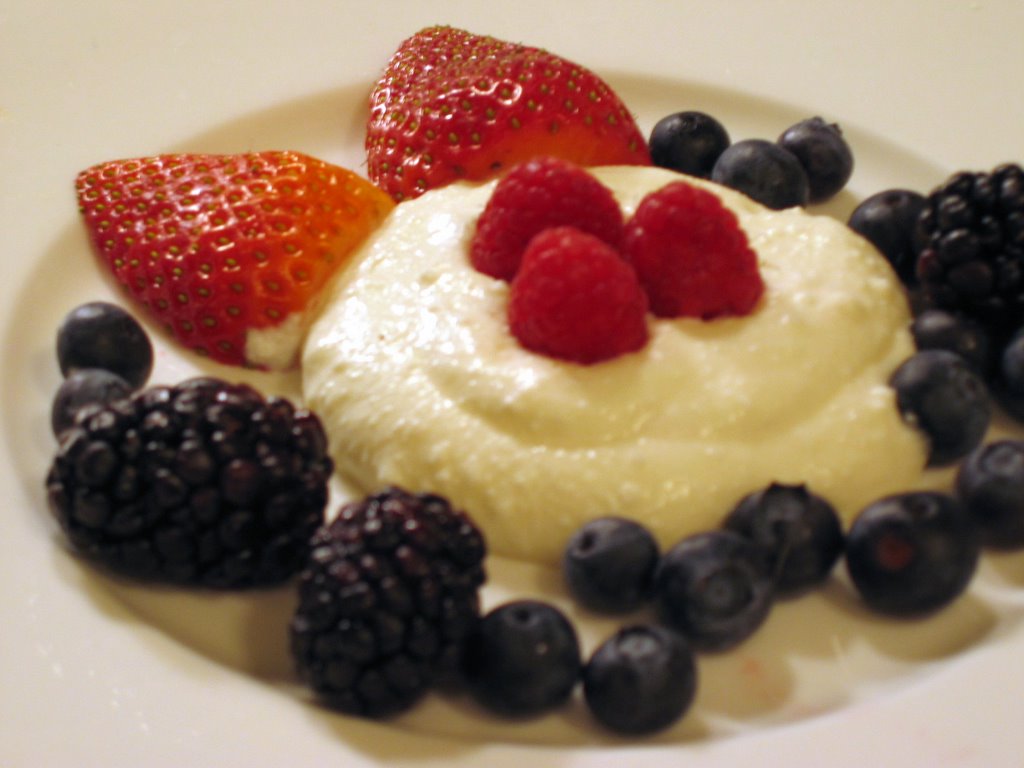
Berries with Ricotta Cheese

So you of course could not resist making my Scallops with Caramelized Pearl Onions and Tarragon Crème Fraiche Sauce, and now you are wondering what to do with that leftover Crème Fraiche. Or at least this is what I was thinking as it sits in my refrigerator hoping to be used in one last dish. So here is what I came up with.

This recipe is based on the idea of the typical strawberries with crème fraiche, but I added ricotta cheese to make it richer and thicker. Oh-la-la! And like the scallops, this is an easy dish.

The ingredients are (per serving):
  • 4 tbsp ricotta cheese (All I had in my refrigerator was part skim ricotta cheese, and this worked well. Of course the regular will probably taste better though!)
  • 2 tbsp Crème Fraiche (I love that accent on the "e"...it makes me feel sophisticated)
  • 1/4 tsp vanilla extract (Y'all, use the good stuff. You can find it at Williams-Sonoma. Yes, it is expensive but the difference in taste is huge.)
  • 1/2-1 tsp sugar
  • Handful of berries

Mix the first four ingredients together. Then place on a dish or in a bowl and sprinkle with the berries. So simple, so good, so elegant and a nice ending to a good meal with friends.

Labels: , ,