January 10, 2009

Homemade Vegetable (and Fruit) Wash

Lately I have become more and more paranoid about the pesticides that are inevitably on the vegi’s and fruit we buy at the market. Of course you don’t have this problem with organic produce, but most of us can’t afford to buy all organic food nor can we find everything we need in the organic section of the market. But fear not my readers, I have found a homemade vegetable wash that should do the trick pretty easily and leave you feeling good about the produce that you are eating.

I know that you can buy vegetable washes at the market, but these are usually overpriced and really no more effective than a homemade wash. In my search for a recipe, I found that you can either choose to make a solution that you spray onto your produce, or you can make a wash that you soak them in. Frankly, I have a hard time believing that a spray is all that effective. Sure, may be on nice smooth vegi’s and fruits like tomatoes and apples; but what about our other favorite, more complicated items like broccoli or herbs? How can a spray reach all the crevices and surface areas? Therefore, readers, I dare not lead you astray and will only focus on the wash that you can soak your beloved produce in and feel confident that all parts have been treated properly.

This solution is made of vinegar and salt—cheap ingredients and items you always have on-hand. These ingredients (combined with water) help remove the wax from your produce, neutralize the pesticides, and kill any bacteria that may exist. Furthermore, they will do all of this while not leaving a taste behind. Now when I come home from the market, I immediately make up this wash, soak my produce, and within minutes have worry-free vegi’s and fruit waiting for me to enjoy.

So here is the recipe:
  • ¼ cup vinegar
  • 2 tbsp salt
  • water
  1. Rinse your produce under running water and set aside.
  2. Mix the vinegar and salt in a large bowl or clean sink until the salt dissolves (adding a little warm water will help the salt dissolve faster).
  3. Add water to fill the bowl or sink (if the sink is large, you may want to only fill it a few inches high with water or double the vinegar and salt portions).
  4. Submerge the produce in the solution and let sit for 15 minutes. Remove and rinse with clean water.

Enjoy!

Labels: , ,

June 18, 2008

Skate with Peas & Mint

A couple weeks ago I watched the documentary, The Real Dirt on Farmer John. This movie tracks the history of farmer John’s family roots and the difficulties he faces in continuing the family business. As you can probably guess, keeping the family farm in business has been a challenge for him. The touching part of the film is seeing how much that affects him—not so much financially as much as emotionally. Farmer John is an endearing, unique character with a darling mother so of course I now picture every farmer being like him, which makes me want to rush out and support my local farmers’ market even more.

My urge to increase my visits to the farmers’ market is also encouraged by the environmental aspects. I admit it—I have never been all that into going out of my way to “save the environment.” This is mostly because I feel a bit confused by all the conflicting information. For example, one day those who buy a Toyota Prius are being patted on the back for saving our Earth only to find out the next day that making the dang car is actually worse for the environment than other alternative autos. Sheesh.

My friend, Libby, recently started a new blog called How Green Is…, which focuses on the environment in a realistic manner. Reading her blog has helped put the environment back in the forefront of my mind. I mean, I am still annoyed by all the conflicting information, but there are some things that are pretty straightforward. Such as, buying your food locally means that the food is being driven a shorter distance, which we can all agree is better for the environment. Phew.

So for these reasons (and some others, which I won’t get into now), I am now trying to run out to my farmers’ market even more.

The other day I was watching Jamie Oliver’s show, Jamie at Home. He brought us to his greenhouse where he put together a yummy looking dish with smashed raw peas and mint, which he served over grilled toast. This peaked my interest so I headed to the farmer’s market looking for ingredients to make something similar, and here is what I came up with (for 1 serving):
  • ¾ - 1 cup shelled, raw sugar snap peas
  • ¼ cup fresh mint, chopped
  • 1 lemon
  • 1 tsp plus 2 tbsp Olive oil
  • Salt
  • 1 Skate fillet (alternatively, you can also use turbot)
  • Flour
  1. Carefully chop the fresh peas, and then put them into a bowl (or you may have better luck keeping them on the cutting board). Add the mint, zest from the whole lemon, and 1 tbsp olive oil. Smash together with a pestle/ back of wooden spoon/ or fork. Squeeze one half of the lemon into the mixture. Add salt to taste (don’t be shy with the salt). (If you have a mortal and pestle, this would be ideal. Using a food processor on “pulse” would also make this easier.)
  2. Rub the sake fillet with 1 tsp of olive oil. Dredge fish in flour and shake excess flour off. Add 1 tbsp olive oil to a non-stick pan over medium high heat. Add the fish and cook on both sides until cooked through. (My fillet took about 3-4 minutes on each side.)
  3. Serve fish on plate and squeeze other lemon half on top. Spoon pea mixture onto fish. Garnish with a drizzle of olive oil on the plate around the fish.
Enjoy!

Labels: , ,

May 14, 2008

Ramps (also called “Wild Leeks”)

I just finished serving jury duty for a trial that lasted a whopping two full weeks! On the upside the trial was conducted in the New York Supreme Court, which is the courthouse with all the steps that you see in Law & Order. That made me feel kind of cool, and of course I was sure to smile whenever I left the building since I was in the background of many tourists’ photos.

So what was my case? Well, as Uma Thurman’s stalker trial was going on a couple buildings down, I was placed on a trial dealing with the breach of an oral contract and fiduciary duties related to a hedge fund partnership. Okay so honestly I actually thought it was really interesting, but I know one of my fellow jurors disagreed as he literally slept through half the trial!

I have a bad habit of laughing at inappropriate moments, and there were definitely plenty of times throughout the trial that this bad habit was challenged. For starters, one of the defendants was named Mr. Freelove. Are you kidding me? Every time I heard the lawyers or witnesses say his name, I kept hearing in my head (set to very cheesy music) “Doctor Freeeloooove”. Yes, I chuckled each time.

I also loved that every time an important point was made, everyone’s heads would snap towards us jurors to see our reactions. Their faces were so serious. Yes, I laughed here too. Not sure how they read that reaction.

Meanwhile, our judge was a sweet older woman but she could not hear a word! Throughout the entire trial, she kept abruptly yelling out, “What? What? You have to speak louder! I can’t hear you!” Yes, I laughed out loud at these moments too.

Then of course there was one witness who had these abnormally massive hands. I kid you not, the palm of his hand alone was about ¾ the size of his face! His hands were just as out of proportion as the woman with “man hands” in that Seinfeld episode. Yup, I laughed.

Anyway, despite the entertainment of the court room, the days were long and tiring. So after being cooped up in the court room for yet another day, I decided to take advantage of how beautiful it was outside and walked home one day. Along my walk I came upon the Union Square Greenmarket. This time of year the market is filled with farmers selling ramps. I have always been curious about ramps so I picked some up and continued my way home.

Ramps, also known as wild leeks, have a taste that is somewhere in the middle of onions and garlic. If you buy some, you will quickly smell that they have a strong odor that is closer to garlic (I might even go as far to say that they have a stinky smell). As I suggested above, ramps are only in season in the spring time. I also learned that they are native to North America, and I believe that they are most popular in the Appalachian Mountains.

So where can you find them? Unfortunately, even with access to all the wonderful grocery stores in New York City, I have only seen them at the Farmers’ Market. So you may need to go to your local market to find them (but how great it is to support local farmers!). I also found that you can order them online from Earthy Delights.

So what did I make with my ramps? I sautéed them for a sauce served with a delicate white fish, which was such a great combination. Stay tuned as I plan to post my recipe for the dish I made…

Labels: ,

April 29, 2008

Avocado and Watercress Salad

I was thumbing through the light recipes on Epicurious looking for an idea for lunch. I came across this recipe for an avocado and watercress salad, which was featured in Gourmet magazine. This recipe evidently originates from Natori, a Japanese restaurant in New York. The recipe looked so great. A soy sauce based dressing that includes grated apples? How interesting! And how can you go wrong when avocados are a main feature to the dish? Plus I love the bitter taste of watercress.

I think this dish took me a whopping 15 minutes to make—perfect for a lunch. I even had some leftover to have along with my dinner. The dressing is so tasty that you should save any extra dressing for salads later in the week. I bet it would also be great served over steamed veggies, potatoes, or even a fish.

A hint: When preparing the watercress (it needs to be just the leaves and thin stems), hold the stems of the bunch in one hand. With your other hand take a chef’s knife and at an angle slide the blade along the stems away from yourself such that the leaves and thin stems are sliced off leaving behind the thicker stems. Keep doing this until all leaves are removed.

Okay, here is the recipe from Gourmet magazine (May 2008), which makes 6 servings:

  • 1/4 cup rice vinegar (not seasoned)
  • 1 tablespoon grated sweet onion such as Vidalia or Walla Walla (use large holes of a box grater)
  • 1/4 cup finely grated peeled Gala apple (use small holes of box grater)
  • 4 teaspoons soy sauce
  • 1 teaspoon sugar
  • 3 tablespoons vegetable oil
  • 6 cups watercress (thin stems and leaves only; from 1 large bunch)
  • 1 firm-ripe avocado
  1. Stir together vinegar, onion, apple, soy sauce, and sugar until sugar has dissolved, then stir in oil.
  2. Just before serving, toss watercress with enough dressing to coat.
  3. Quarter, pit, and peel avocado, then cut crosswise into 1/4-inch-thick slices. Gently toss with watercress.
Enjoy!

Labels: , ,

October 05, 2006

Simple Tomato and Arugula Salad with Goat Cheese

Yesterday I entered my fourth decade in life. To appropriately honor this 30th birthday, I took the day off work (as well as the remainder of this week!) to truly treat myself. Like a true New Yorker, I began my day with a bagel and cream cheese accompanied by a frothy latte. Then I was off to the Oasis Day Spa for a Swedish massage, courtesy of my dear friend Laura. Oh the luxury!

Since it was Wednesday, the farmers market was going on in Union Square. So after my spa treatment I meandered down there and roamed the market—one of my favorite things to do in New York. Many of New York’s local farmers set-up their stands here and offer an abundance of seasonal fresh produce.

Since my best friends are taking me out to celebrate my birthday this weekend, I opted to have a couple of them over for a simple dinner last night. I already knew what I wanted to serve for the main dish but was undecided about the starter. So I leisurely roamed the market scouting out the options. I wanted to serve something simple to make so that I wouldn’t have to spend too much time in the “kitchen” (I put “kitchen” in quotes because I more so have a kitchen nook), but at the same time elegant and special.

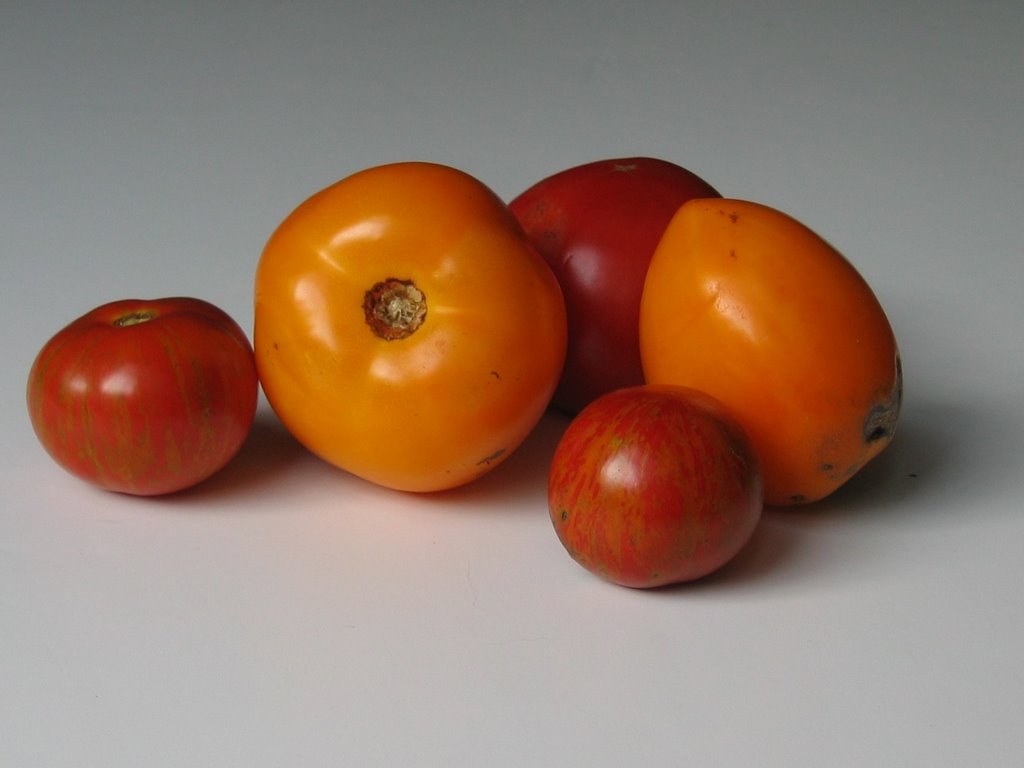
I have lately been really into tomatoes—so sweet, refreshing, and healthy. So I opted for a salad that would focus on these veggies. I chose heirloom tomatoes, which I believe are the tastiest of the tomato varieties. These awkward looking tomatoes are certainly tastier than the ordinary beef steak ones! I also opted for a variety of colors and sizes to make the salad especially pretty.

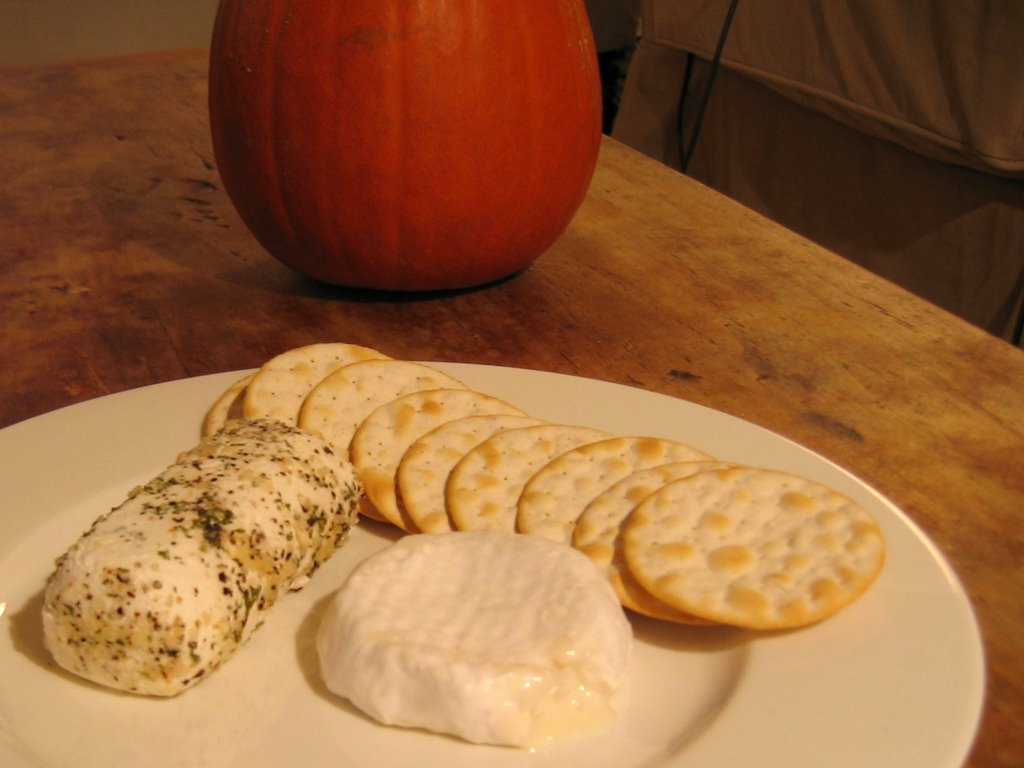
I wanted to pair the tomatoes with a leafy green so I chose arugula. This peppery leaf was the perfect contrast to the sweet taste of the tomatoes. I also wanted to add a third texture and flavor to the salad so after visiting the leaf guy, I walked over to the goat cheese lady. Here I bought a garlic and herb goat cheese log to top the salad and to also serve with crackers prior to the meal. Yum! The nice goat cheese lady also introduced me to a goat’s milk brie, which I also had to get. It was just too yummy looking to pass up, and I am a cheese slut afterall.

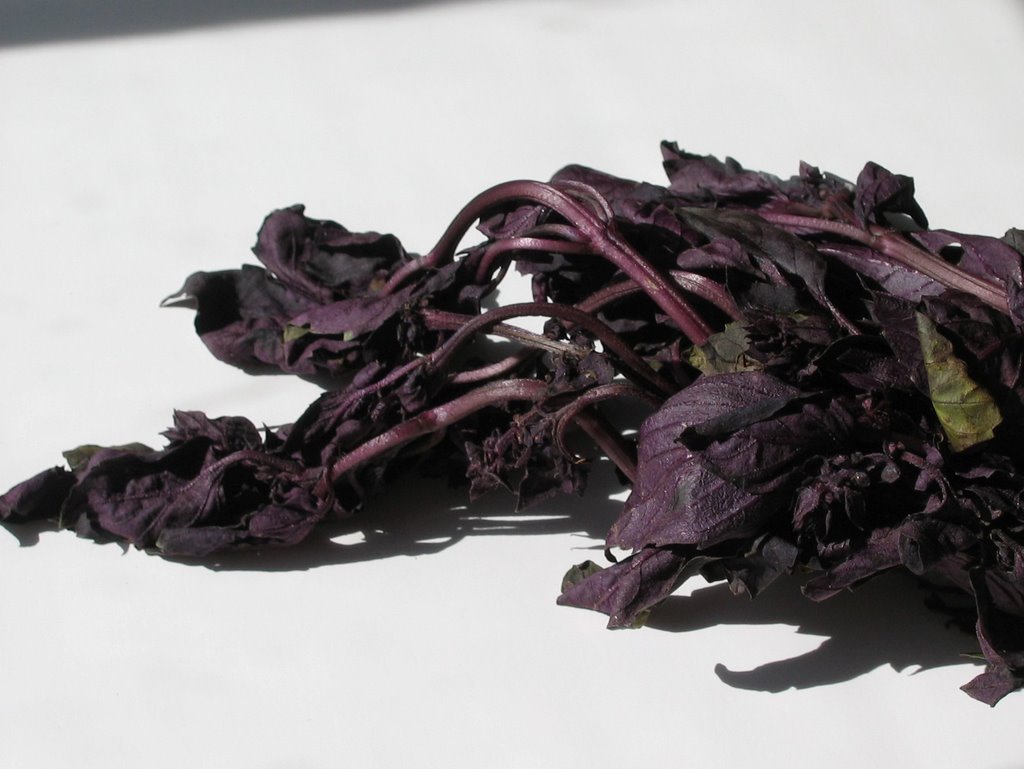
I was still yearning for something extra, so I continued to meander and found a farmer selling a wide variety of fresh herbs. Amongst his selection was an assortment of basil. In one of my food magazines I remember them explaining all the types of basil. I was particularly intrigued by purple basil, which I had never even heard of. This farmer had it so I was sold and chose this as my final ingredient to my salad. This variety of basil is a bit stronger in taste than the regular sweet basil, and the rich color was the perfect contrast to my salad.

After stopping by a lovely sidewalk cafe for some white wine and oysters, I finally made it home and prepared my special salad. The final product was simply perfect—easy to put together, aesthetically pleasing, and extremely flavorful. Here is the gist of the “recipe” (per serving):
  • Handful of arugula leaves
  • Variety of tomato slices—large/small, red/yellow
  • Dash of diced shallot
  • 5 dabs of goat cheese
  • 1 tsp of balsamic vinegar
  • 1 tsp extra virgin olive oil
  • 1 tbsp sliced basil (purple if you can find it)
  • Coarse salt and pepper
  1. Lay a bed of arugula leaves on a small plate.
  2. Spread a layer of the tomato slices on top of the arugula.
  3. Sprinkle shallot pieces over the tomatoes, followed by the goat cheese dabs.
  4. Pour the balsamic vinegar and extra virgin olive oil over the salad.
  5. Garnish with sliced basil
  6. Add salt and pepper to taste.
Enjoy!

Check-in later for my post about my entree dish (creamy polenta served with sautéed mushrooms, pancetta, and thyme topped off with a white wine reduction cream sauce)…

Labels: , , ,

September 27, 2006

Roasted Acorn Squash with Chile Vinaigrette

Wow, look at me—a second post in one week’s time! You’d think we were back in the past when I was posting 2-3 times a week. Generally I prefer posting my own creations, but I have either been too busy or too tired to focus on them. So I guess I will have to resort to the recipes found in my eight—yes 8—food magazine subscriptions!

Tonight I made a fabulous veggie recipe that I found in my Gourmet magazine for acorn squash. This peeked my interest because a) acorn squash is such a Fall vegetable and hence a great way to welcome to new season, b) how can you go wrong with adding flavors like lime, garlic, cilantro, and hot red chile to a dish?, and c) talk about an easy recipe—perfect seeing that my job has been kicking my ass this week and all I want to do is relax when I get home.

Since I was making this dish for one, I used only one acorn squash (the recipe called for two) which was more than plenty to feed me as my main dish (it was a wopping 2 pounder!). However, y’all know that I don’t think you can ever have too much sauce so I didn’t half that. Now you purists might think that essentially doubling the vinaigrette takes away the taste of the squash but I didn’t care—the vinaigrette was awesome. So for you non-purists, I amended the recipe below by increasing the dressing proportions (about 50%).

One last thing, the acorn squash was a bitch to cut through. Please be sure to use a good, strong, sharp knife. Even then, please be careful! My knife rocks, but I still had difficulty getting through that bugger.

So here you go—the recipe adapted from Gourmet magazine (serves 4):
  • 1 (1 ½ to 1 ¾ lb) Acorn squash
  • ½ tsp Black pepper
  • 1 ¼ tsp Salt
  • 8 tbsp Olive oil
  • 1 ½ Garlic cloves
  • 2 ½ tbsp Fresh lime juice
  • 2-3 tsp Finely chopped fresh hot red chile, including seeds (See Note 1)
  • 3 tbsp Chopped fresh cilantro
  1. Put oven racks in upper and lower thirds of oven and preheat oven to 450 degrees Fahrenheit.
  2. Halve squash lengthwise, then cut off and discard stem ends. Scoop out seeds (you can later roast them for a snack!) and cut squash lengthwise into ¾ inch-wide wedges.
  3. Toss squash with black pepper, ¾ teaspoon salt, and 2 tablespoons oil in a bowl.
  4. Arrange cut sides down in 2 large shallow baking pans. Roast squash, switching position of pans halfway through roasting, until squash is tender and undersides of wedges are golden brown, 25 to 35 minutes.
  5. While squash roasts, mince garlic and mash to a paste with remaining ½ teaspoon salt. (See Note 2)
  6. Transfer paste to a small bowl and whisk in lime juice, chile (to taste), cilantro, and remaining 6 tablespoons olive oil until combined.
  7. Transfer squash, browned sides up, to a platter and drizzle with vinaigrette.

If you are interested in seeing other healthy recipes, you can check out Sweetnick's food blog for her "ARF/5-a-day Tuesdays."

Enjoy!

Notes:
  1. My market did not have hot red chile peppers so I opted for a red cherry chili, which also worked well.
  2. The salt is important here because it acts as a grinder for the minced garlic. Simply take the wide side of your knife and place it on top of the garlic and salt mixture. Then, with downward pressure, pull the knife towards you (like a putty knife). Do this a handful of times until the garlic turns into a paste.

Labels: ,

May 01, 2006

Fiery Thai Beef Salad

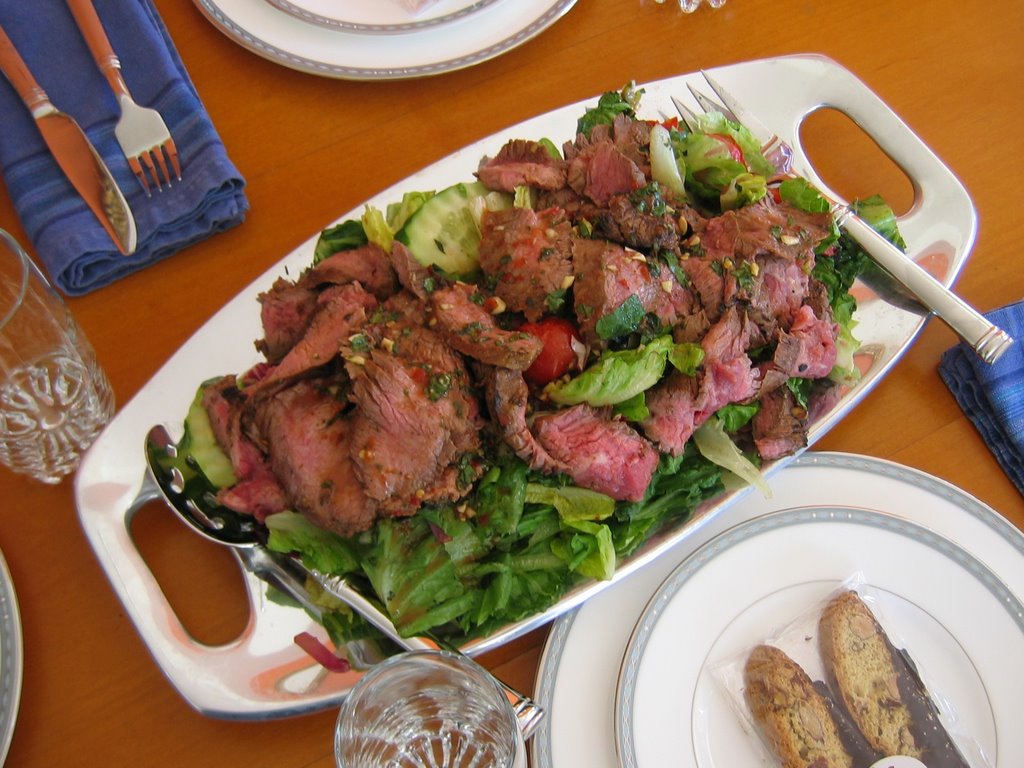
My friend Shirley hosted a brunch at her place this past Sunday. I was expecting something pretty low key but Shirley went all out—we even ate off her china! Each of us were responsible for an item, but Shirley nonetheless still made several dishes as well. One of them was a Thai styled beef salad.

Shirley had clipped this recipe from an old Cooking Light magazine—July 1999, to be exact! All these years she kept the recipe and finally used it this past weekend. Shirley noted that she omitted the fresh lemongrass because she couldn't find it and thought it would be too fibrous in the salad. However, she was able to find all the other ingredients very easily.

The outcome? I loved this and will definitely make it myself too. It was very tasty and the cilantro and mint provided with a great, unique flavor.

The recipe, from Cooking Light, is as follows (for 4 servings):

Dressing:

  • 1/3 cup fresh lime juice
  • 1/4 cup chopped fresh cilantro
  • 2 tablespoons brown sugar
  • 1 tablespoon water
  • 1 tablespoon Thai fish sauce
  • 5 garlic cloves, minced
  • 2 Thai, hot red, or serrano chiles, seeded and minced

Salad:
  • 1 (1-pound) flank steak
  • 1/4 teaspoon salt
  • 1/8 teaspoon black pepper
  • Cooking spray
  • 6 cups torn romaine lettuce
  • 1 3/4 cups quartered cherry tomatoes
  • 1 cup thinly sliced red onion, separated into rings
  • 1/4 cup coarsely chopped fresh mint
  • 2 tablespoons sliced peeled fresh lemon grass
  1. To prepare dressing, combine first 7 ingredients in a bowl; stir well with a whisk.
  2. Prepare grill or broiler.
  3. Sprinkle both sides of steak with salt and pepper. Place steak on a grill rack or broiler pan coated with cooking spray, and cook 6 minutes on each side or until desired degree of doneness. Let stand 10 minutes. Cut steak diagonally across grain into thin slices; cut each slice into 2-inch pieces.
  4. Combine steak, lettuce, and remaining ingredients in a large bowl; add dressing, tossing to coat.

Labels: , ,

April 09, 2006

Fennel Salad

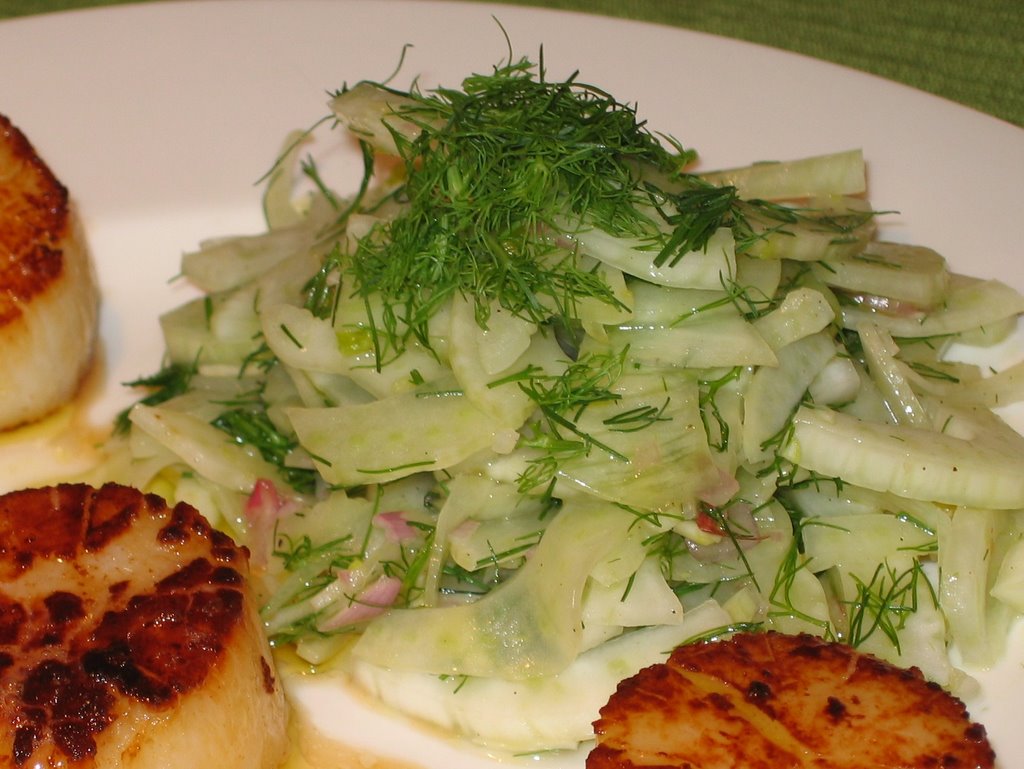
As it is now becoming warm out, I have been craving light, summary salads. So when I was in the market and spotted the beautiful fennel, I decided that would make up my next salad.

I actually had never worked with fennel before but see chefs on The Food Network using it all the time. As I recall, these chefs would describe the taste as being similar to licorice, and after having tasted it myself, I definitely agree. Fennel has a very unique and refreshing flavor. It also maintains a nice crunch, which makes for a great salad.

So here is how I made the salad (for either 2 side servings, or 1 entrée serving):
  • Juice from 1 lemon
  • Extra virgin olive oil (enough so that the lemon juice to oil ratio is 1:2)
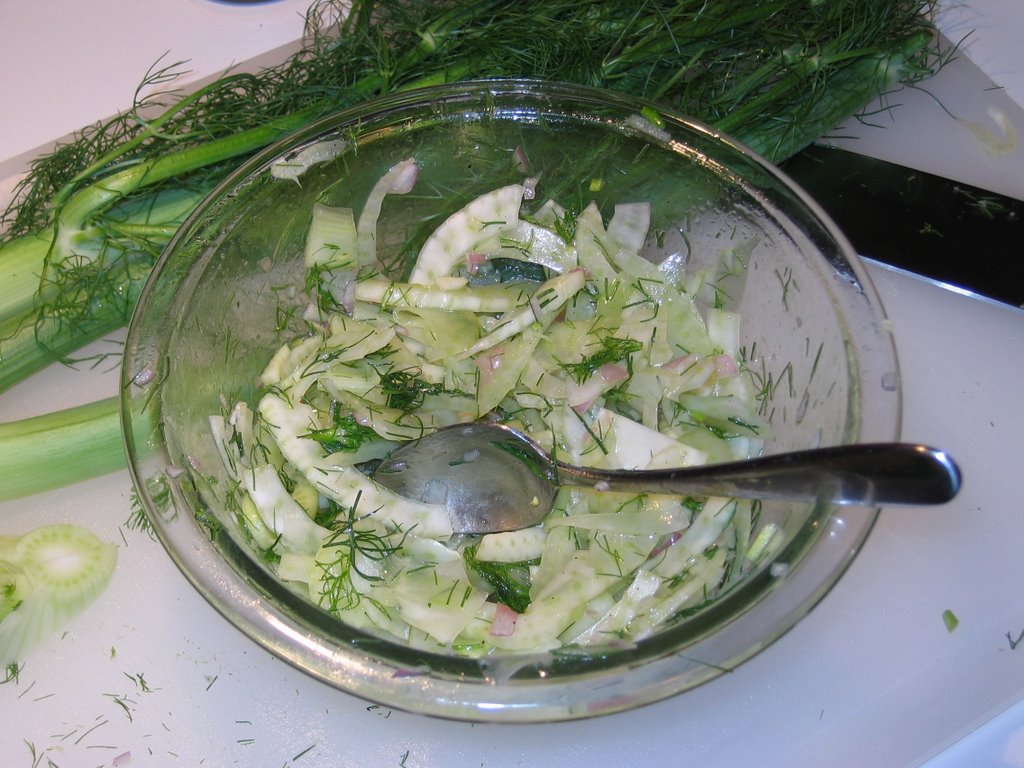
  • 1 Fennel bulb, sliced very thinly (See Note 1)
  • 1 Shallot, diced
  • 3 tbsp Fennel fronds, chopped (See Note 2)
  • Salt and pepper, to taste
  1. In a bowl add lemon juice. Now slowly pour in the olive oil while whisking to emulsify the dressing.
  2. Add remaining ingredients and toss
Wow that was easy and yet so good and perfect for a warm spring day! Enjoy!


Notes:
  1. You only want to use the bulb portion of the fennel. Some grocery stores, like the one I bought my fennel at, leave the stalks on the fennel. Just cut these off where they attach to the bulb and put aside. Do keep the stalks, though, because we will use the fronds in just a little bit. Now thinly slice the bulb, discarding the tough core.
  2. What? Your fennel didn’t come with the stalks and fronds? You freak! No, no, do not worry. Most markets sell just the fennel bulbs so you are not really a freak. In place of the fronds, I suggest using flat leaf parsley or dill. If you use dill, add about 2 tbsp (1 tbsp or less, if dried).

Labels: , ,

March 19, 2006

String Beans with Garlic Mustard Vinaigrette

About two years ago I had a revelation—vegetables can be good! I used to detest anything green. When I was little, my mom would not let me leave the table until I ate all my greens. I would sit there for hours! By the time I finished my last bite, my parents had already cleaned the dishes and were ready for bed. I just hated vegetables, but recently I learned that if I prepare them with the right seasonings, I actually really like them—in fact, I now even crave them.

String beans are one of my favorites. I usually dress them with this garlic mustard vinaigrette that Jamie Oliver suggests in one of his cookbooks. I used too much on my beans pictured above (I made dressing for two servings and used only one serving of beans), but you get the idea. You can also, of course, use this dressing on other vegi’s as well.

Adapted from Jamie Oliver’s recipe, here is how I make my string beans and dressing (for two servings):
  • 2 handfuls of string beans
  • 1 tbsp white vinegar
  • 2 tbsp olive oil
  • 1 tbsp Dijon mustard
  • 1 garlic clove, minced
  • Salt and pepper, to taste
  1. In a pot over high heat, fill 2/3's with water and cover. When the water reaches the boiling point, add beans and cook through (like Jamie Oliver, I like my beans fully cooked and not crunchy—that squeaky sound on my teeth drives my crazy!). The beans are ready when they can bend with ease.
  2. As you are waiting for the water to boil and the beans to cook, add the remaining ingredients in a bowl and whisk together.
  3. When beans are cooked, drain and add to bowl and toss with dressing.
Enjoy!

Labels: , ,

February 27, 2006

Swiss Chard

So my friend Alison has recently been obsessed with a website that quizzes you on the food you eat and then tells you just how vitamin-deficient you are as a result of your poorly chosen diet. Intrigued, I tried it out myself only to finish the process feeling too malnourished to move from my seat. Okay, so these websites do tend to set the bar pretty high as they are usually created by vegetable-hugging fanatics who think food like cookies are only meant for the devil, but it did make me rush to the produce section my market.

I stood in the produce section looking around for a new vegetable to try. As I was standing here paranoid about my lack of nutrition, the produce guy asked me, “Where are have you been? Hiding? I haven’t seen you here in a while!” Okay, okay, I get the idea. More vegetables, less dinners out. Check.

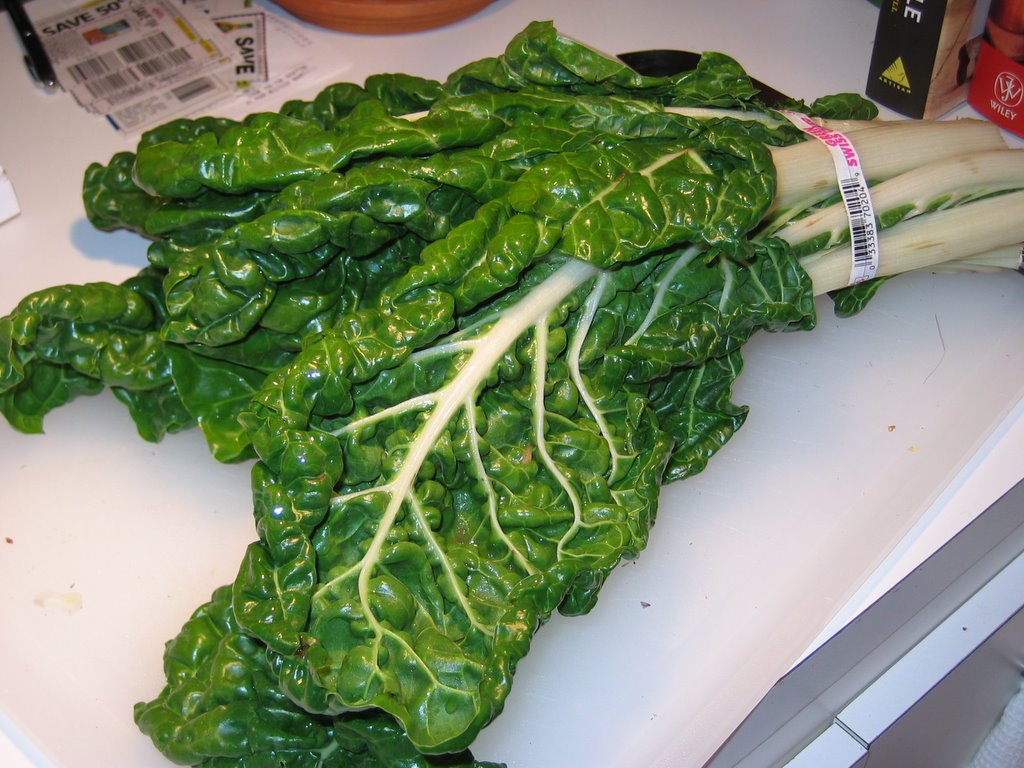
My eyes then settled on the Swiss chard. I have seen cooking shows prepare this leafy green, but I had yet to try it out myself. Knowing that I love spinach, I thought this would be a good variation to try out—and it is a great source of beta-carotene and dietary fiber! So I gathered a bunch of Swiss chard and headed to the checkout counter.

So what is Swiss chard? Well, this large leafy green grows from a special beet (not the kind you are used to eating, but one that is grown for its leaves). If you don’t like beets (for me, this is one of the few foods I dislike), do not let that deter you from eating this green as it has no beet taste! In fact, Swiss chard tastes a lot like spinach (and no bitter taste!).

The Swiss chard I have here has white stalks, but it also comes with red stalks. You may notice from the pictures that the stalks are quite meaty. When you cook the leaves, you need to cut out the stalks but you can save them to cook separately (you can’t cook them all as one since the stalks will take much longer to cook than the leafy part). I did not try the stalks, but I read that they can be prepared just as you would prepare asparagus. I think it would also be nice to add them chopped back to the cooked leaves to allow for a variety of texture to your Swiss chard dish.

As with most leafy greens, Swiss chard must be thoroughly washed. Since it is grown close to the ground, the leaves tend to hold dirt in their crevices. I washed the Swiss chard leaf by leaf under the running faucet, but everything I read suggested taking a big bowl of water and washing the leaves in this , two or three times if needed.

When it comes to preparing Swiss chard, you can pretty much make it just as you would make spinach. Here is how I prepared it (per 2 side servings):
  • 2 cups water
  • ½ bunch of Swiss chard (about 3-4 large leaves), chopped width-wise into 1 inch thick pieces (don’t forget to remove the stems)
  • 2 tbsp butter
  • 1 garlic clove, minced
  • ½ lemon zest
  • Salt and pepper
  1. Boil water in a large sauté pan.
  2. Add Swiss chard and cook until wilted.
  3. Drain water.
  4. In a small, separate pan over medium low heat add butter. Once butter is melted, add garlic and lemon zest. Let cook for a minute (this allows the lemon oils to release themselves from the zest, and for the garlic’s flavor to mellow).
  5. Add butter mixture to Swiss chard and mix.
  6. Add salt and pepper to taste.
Since I had some Swiss chard leftover, I made it again a couple days later (don’t let your Swiss chard sit in your refrigerator for more than two days). Since boiling Swiss chard causes much of the vitamins to transfer to the water, which only is later thrown out, I decided this time to sauté it.

Here is how I sautéed the Swiss chard (per 2 side servings):
  • 1 tbsp butter
  • 1 tbsp olive oil
  • 1 garlic clove, minced
  • ½ lemon zest
  • ½ bunch of Swiss chard (about 3-4 large leaves), chopped width-wise into 1 inch thick pieces (don’t forget to remove the stems)
  • Salt and pepper
  1. In a sauté pan over medium heat add butter and olive oil.
  2. Once butter has melted, add garlic and lemon zest and let cook for a minute.
  3. Add Swiss chard and cook until wilted.
  4. Add salt and pepper to taste.
Overall, I have to admit that I liked the boiled version better—it was smoother tasting. Also the sautéed version left a little film in my mouth, similar to what spinach leaves behind. However, in my quest for earn a higher score on that darn nutrition website I will probably keep to the sautéed version to guarantee my intake of vitamins!

Labels: , ,

January 26, 2006

Roasted Garlic Cauliflower Soup

What I love about making soup is that it is so darn easy! If you are timid in the kitchen, soup is a great way to get yourself comfortable with cooking. It is also a great start to creating your own dishes because you can really do whatever you are in the mood for.

In deciding on tonight’s dinner, I did what I usually do. I just stood in my market’s produce section staring at all the vegetables thinking about all the options and what flavors I was in the mood for (the produce people at the market are now used to me doing this and know me well).

Since it was a cold, windy day, I wanted something that would be comforting but I also wanted something that would be quick and easy. So I figured I could make cauliflower soup and add roasted garlic to give it the warm, fuzzy feeling (I love garlic, so for me it is a warm fuzzy feeling!).

So here is what you need (per 1 large entrée serving, or 2 appetizer portions):
  • 4 cups chicken or vegetable broth
  • 1 head of cauliflower florets
  • Olive oil (enough to thickly coat bottom of small omelet pan)
  • 5 cloves of garlic (you can use less, about 2-3, if you do not want a strong garlic flavor)
  • Salt and pepper to taste
  • Parsley to garnish
  1. Pour broth into a pot and add cauliflower florets. Bring the broth to a boil and cook until the cauliflower is tender.
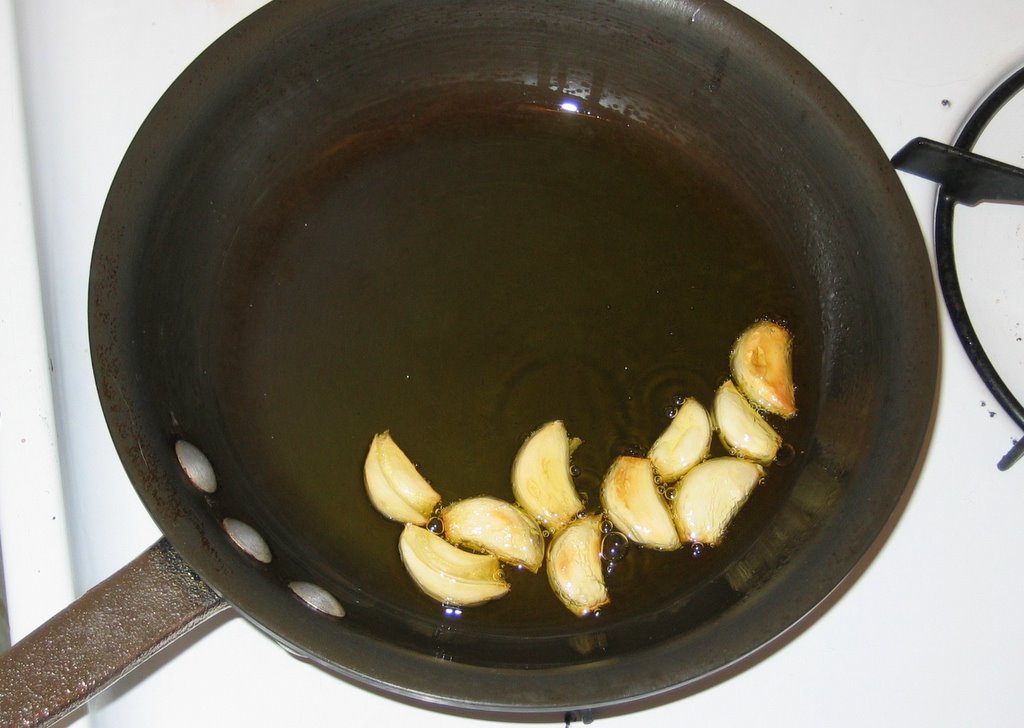
  2. As the cauliflower is cooking, put olive oil and garlic cloves into a pan over a very low heat. You want to slowly cook the garlic without burning it. The garlic is ready when it is tender and lightly browned. (see picture)
  3. When cauliflower and garlic are ready, place garlic and olive oil into a food processor. Then take the cauliflower florets out of the broth (reserving the broth—you need it in the next step) and place them in the food processor (I think a blender would work as well). Mix until well pureed.
  4. Slowly add the broth until the soup reaches the desired consistency. It is best to only add one ladles’ worth at a time, mix, and then decide if you want more broth.
  5. Add salt and pepper to taste.
  6. Pour soup into bowl(s) and garnish with parsley.


Now let me share a little warning with y’all. If you must drink some of the soup directly from the food processor bowl, be sure to first remove the blade in order to prevent the big, sharp blade from falling out, hitting you on the face, and cutting your lip. Um, yes, I do now have a cut lip…

Labels: ,